RBC254FSB - Produktinfo.conrad.com
RBC254FSB - Produktinfo.conrad.com
RBC254FSB - Produktinfo.conrad.com
Create successful ePaper yourself
Turn your PDF publications into a flip-book with our unique Google optimized e-Paper software.
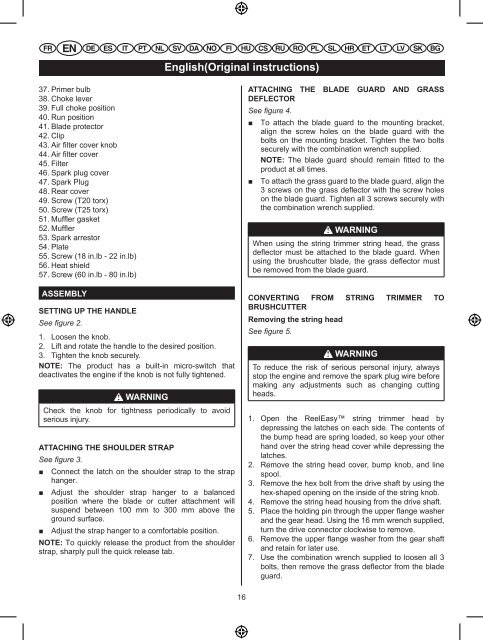
37. Primer bulb<br />
38. Choke lever<br />
39. Full choke position<br />
40. Run position<br />
41. Blade protector<br />
42. Clip<br />
43. Air lter cover knob<br />
44. Air lter cover<br />
45. Filter<br />
46. Spark plug cover<br />
47. Spark Plug<br />
48. Rear cover<br />
49. Screw (T20 torx)<br />
50. Screw (T25 torx)<br />
51. Muf er gasket<br />
52. Muf er<br />
53. Spark arrestor<br />
54. Plate<br />
55. Screw (18 in.lb - 22 in.lb)<br />
56. Heat shield<br />
57. Screw (60 in.lb - 80 in.lb)<br />
ASSEMBLY<br />
SETTING UP THE HANDLE<br />
See gure 2.<br />
1. Loosen the knob.<br />
2. Lift and rotate the handle to the desired position.<br />
3. Tighten the knob securely.<br />
NOTE: The product has a built-in micro-switch that<br />
deactivates the engine if the knob is not fully tightened.<br />
WARNING<br />
Check the knob for tightness periodically to avoid<br />
serious injury.<br />
ATTACHING THE SHOULDER STRAP<br />
See gure 3.<br />
Connect the latch on the shoulder strap to the strap<br />
hanger.<br />
Adjust the shoulder strap hanger to a balanced<br />
position where the blade or cutter attachment will<br />
suspend between 100 mm to 300 mm above the<br />
ground surface.<br />
Adjust the strap hanger to a <strong>com</strong>fortable position.<br />
NOTE: To quickly release the product from the shoulder<br />
strap, sharply pull the quick release tab.<br />
English(Original instructions)<br />
16<br />
ATTACHING THE BLADE GUARD AND GRASS<br />
DEFLECTOR<br />
See gure 4.<br />
To attach the blade guard to the mounting bracket,<br />
align the screw holes on the blade guard with the<br />
bolts on the mounting bracket. Tighten the two bolts<br />
securely with the <strong>com</strong>bination wrench supplied.<br />
NOTE: The blade guard should remain fitted to the<br />
product at all times.<br />
To attach the grass guard to the blade guard, align the<br />
3 screws on the grass deflector with the screw holes<br />
on the blade guard. Tighten all 3 screws securely with<br />
the <strong>com</strong>bination wrench supplied.<br />
WARNING<br />
When using the string trimmer string head, the grass<br />
de ector must be attached to the blade guard. When<br />
using the brushcutter blade, the grass de ector must<br />
be removed from the blade guard.<br />
CONVERTING<br />
BRUSHCUTTER<br />
FROM STRING TRIMMER TO<br />
Removing the string head<br />
See gure 5.<br />
WARNING<br />
To reduce the risk of serious personal injury, always<br />
stop the engine and remove the spark plug wire before<br />
making any adjustments such as changing cutting<br />
heads.<br />
1. Open the ReelEasy string trimmer head by<br />
depressing the latches on each side. The contents of<br />
the bump head are spring loaded, so keep your other<br />
hand over the string head cover while depressing the<br />
latches.<br />
2. Remove the string head cover, bump knob, and line<br />
spool.<br />
3. Remove the hex bolt from the drive shaft by using the<br />
hex-shaped opening on the inside of the string knob.<br />
4. Remove the string head housing from the drive shaft.<br />
5. Place the holding pin through the upper ange washer<br />
and the gear head. Using the 16 mm wrench supplied,<br />
turn the drive connector clockwise to remove.<br />
6. Remove the upper ange washer from the gear shaft<br />
and retain for later use.<br />
7. Use the <strong>com</strong>bination wrench supplied to loosen all 3<br />
bolts, then remove the grass de ector from the blade<br />
guard.


