Setup and Assembling Bookeye 3 - Image Access Inc.
Setup and Assembling Bookeye 3 - Image Access Inc.
Setup and Assembling Bookeye 3 - Image Access Inc.

You also want an ePaper? Increase the reach of your titles
YUMPU automatically turns print PDFs into web optimized ePapers that Google loves.
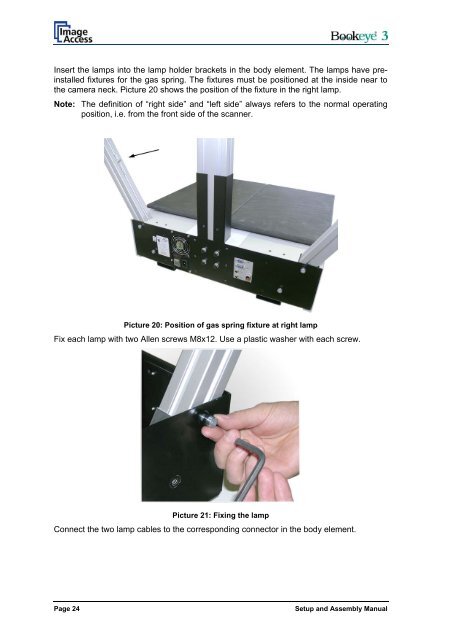
Insert the lamps into the lamp holder brackets in the body element. The lamps have preinstalled<br />
fixtures for the gas spring. The fixtures must be positioned at the inside near to<br />
the camera neck. Picture 20 shows the position of the fixture in the right lamp.<br />
Note: The definition of “right side” <strong>and</strong> “left side” always refers to the normal operating<br />
position, i.e. from the front side of the scanner.<br />
Picture 20: Position of gas spring fixture at right lamp<br />
Fix each lamp with two Allen screws M8x12. Use a plastic washer with each screw.<br />
Picture 21: Fixing the lamp<br />
Connect the two lamp cables to the corresponding connector in the body element.<br />
Page 24<br />
<strong>Setup</strong> <strong>and</strong> Assembly Manual