Setup and Assembling Bookeye 3 - Image Access Inc.
Setup and Assembling Bookeye 3 - Image Access Inc.
Setup and Assembling Bookeye 3 - Image Access Inc.

Create successful ePaper yourself
Turn your PDF publications into a flip-book with our unique Google optimized e-Paper software.
A.2.3<br />
<strong>Assembling</strong> the Glass Plate<br />
Insert the book cradle plates into the driving elements <strong>and</strong> place the foam rubber mats on<br />
the plates.<br />
Connect the scanner to the mains power <strong>and</strong> switch it on with the main power switch. The<br />
main power switch is found on the rear side of the scanner, next to the power connector.<br />
The green START LED on the keyboard lights up. This signalizes that the scanner is in<br />
st<strong>and</strong>-by mode.<br />
Press the green START button to start the scanner. When the start sequence is finished<br />
after approximately 30 seconds, the display shows: READY TO SCAN<br />
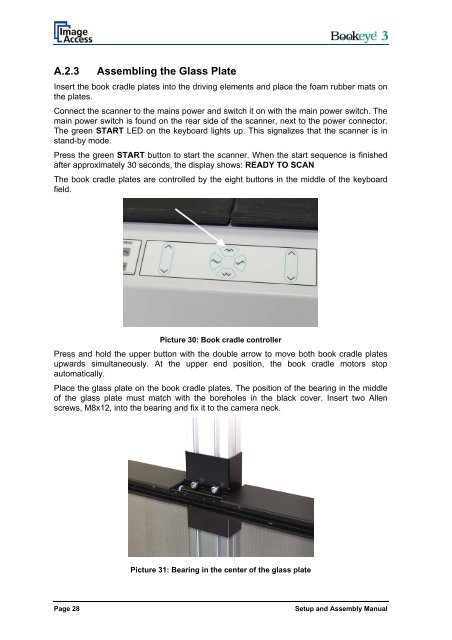
The book cradle plates are controlled by the eight buttons in the middle of the keyboard<br />
field.<br />
Picture 30: Book cradle controller<br />
Press <strong>and</strong> hold the upper button with the double arrow to move both book cradle plates<br />
upwards simultaneously. At the upper end position, the book cradle motors stop<br />
automatically.<br />
Place the glass plate on the book cradle plates. The position of the bearing in the middle<br />
of the glass plate must match with the boreholes in the black cover. Insert two Allen<br />
screws, M8x12, into the bearing <strong>and</strong> fix it to the camera neck.<br />
Picture 31: Bearing in the center of the glass plate<br />
Page 28<br />
<strong>Setup</strong> <strong>and</strong> Assembly Manual