digital video camera gr-dvx707 gr-dvx507 gr-dvx407 gr-dvx400 - JVC
digital video camera gr-dvx707 gr-dvx507 gr-dvx407 gr-dvx400 - JVC
digital video camera gr-dvx707 gr-dvx507 gr-dvx407 gr-dvx400 - JVC

You also want an ePaper? Increase the reach of your titles
YUMPU automatically turns print PDFs into web optimized ePapers that Google loves.
54 EN<br />
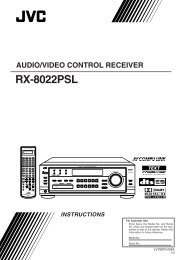
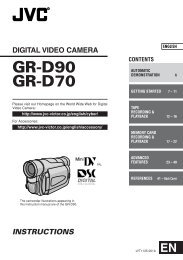
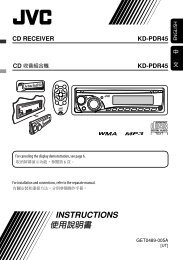
Snapshot Flash (GR-DVX707/<br />
507 only)<br />
SNAPSHOT Button<br />
MENU Wheel<br />
The flash can be used when a snapshot is taken in<br />
Record-Standby mode. ( pg. 27, 53)<br />
● When the Power Switch is set to “A”, the flash<br />
automatically fires if it is dark ( appears).<br />
● When the Power Switch is set to “M”, you can<br />
select the flash setting as follows:<br />
AUTO : Fires automatically if it is dark (<br />
AUTO<br />
C<br />
ON<br />
OFF<br />
appears).<br />
: Fires automatically if it is dark (<br />
appears) and reduces the Red-Eye effect<br />
in the subject’s eyes.<br />
: Always fires.<br />
: Will not fire.<br />
VIDEO/MEMORY<br />
Switch<br />
Power Switch<br />
● For the setting, refer to “Changing The Menu<br />
Settings” ( pg. 38).<br />
If “AUTO C” is selected...<br />
The C Red-Eye reduction indicator lights. Press<br />
SNAPSHOT. The flash fires twice. The first flash is<br />
for reduction of the human eye’s red reflection and<br />
the second flash is for the actual recording.<br />
NOTES:<br />
● Do not fire the flash at a person at short range.<br />
● The flash does not fire when the flash is set to<br />
“OFF” or when Night-Scope mode ( pg. 53) is<br />
engaged, and also when the battery remaining<br />
power is low. Moreover, the flash does not fire<br />
when it is set to “AUTO” with GAIN UP set to<br />
“OFF” ( pg. 45) and with Pro<strong>gr</strong>am AE with<br />
special effects set to “TWILIGHT”. ( pg. 42)<br />
● Although images shot with a flash tend to look<br />
whiter than they actually are, to compensate for<br />
this the camcorder automatically darkens the<br />
picture when using the flash. When shooting a<br />
PLAY<br />
OFF<br />
Lock Button<br />
A<br />
M<br />
FEATURES FOR RECORDING (cont.)<br />
subject at a distance where the flash light cannot<br />
reach (over approx. 2 m), set the flash to “OFF” to<br />
prevent the picture from becoming too dark or<br />
becoming too tinted.<br />
● The colour tone changes depending on the<br />
back<strong>gr</strong>ound lighting conditions, such as under<br />
fluorescent or halogen lamps.<br />
● While charging the flash, blinks and the flash<br />
will not fire. Although noise may appear, this is<br />
not a malfunction and is not recorded. It can take<br />
up to 10 seconds to charge the flash.<br />
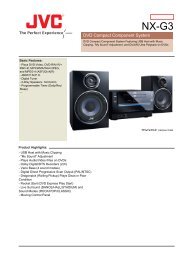
Flash Brightness Adjustment<br />
(GR-DVX707/507 only)<br />
When a snapshot ( pg. 27, 53) is taken in the dark<br />
the camcorder fires the flash and adjusts the<br />
brightness automatically. You can also adjust the<br />
flash brightness manually. When you find that the<br />
snapshots you took look too bright or too dark,<br />
adjust it manually.<br />
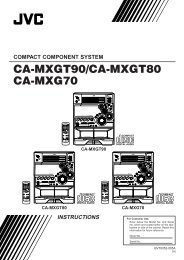
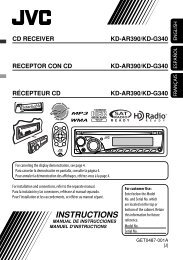
1 Select “FLASH ADJ.” in MANUAL Menu, and<br />
press the MENU Wheel in.<br />
● The parameter appears.<br />
2 To intensify the flash, rotate the MENU Wheel<br />
towards “+”. To weaken the flash, rotate the<br />
MENU Wheel towards “–”.<br />
● Adjustment range: –3 to +3.<br />
3 Press the MENU Wheel in. Rotate the MENU<br />
Wheel to select “BRETURN”, and press it twice<br />
to close the Menu Screen.<br />
NOTE:<br />
When you change the subject you are shooting or<br />
the shooting location, set it back to ±0 as described<br />
in step 2 and take a snapshot to check the flash<br />
brightness. After doing this adjust to your desired<br />
brightness.