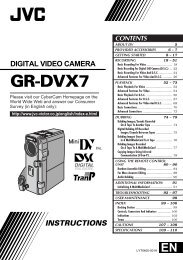
digital video camera gr-dvx707 gr-dvx507 gr-dvx407 gr-dvx400 - JVC
digital video camera gr-dvx707 gr-dvx507 gr-dvx407 gr-dvx400 - JVC
digital video camera gr-dvx707 gr-dvx507 gr-dvx407 gr-dvx400 - JVC
You also want an ePaper? Increase the reach of your titles
YUMPU automatically turns print PDFs into web optimized ePapers that Google loves.
40. Picture does not appear on the<br />
LCD monitor.<br />
41. Images on the LCD monitor<br />
are jittery.<br />
42. The LCD monitor, the<br />
viewfinder and the lens have<br />
become dirty (ex. fingerprints).<br />
40. •The viewfinder is pulled out.<br />
•The LCD monitor’s brightness<br />
setting is too dark.<br />
41. •The speaker volume is too<br />
<strong>gr</strong>eat.<br />
43. Time code does not appear. 43. •“TIME CODE” is set to<br />
“OFF”.<br />
44. An unusual mark appears. 44.<br />
—<br />
45. An error indication (E01, E02<br />
or E06) appears.<br />
46. An error indication (E03 or<br />
E04) appears.<br />
42.<br />
—<br />
45. •A malfunction of some kind<br />
has occurred. In this case the<br />
camcorder’s functions<br />
become unusable.<br />
46. •A malfunction of some kind<br />
has occurred. In this case the<br />
camcorder’s functions<br />
become unusable.<br />
EN 87<br />
40. •Push the viewfinder back in.<br />
•Adjust the brightness of the<br />
LCD monitor. ( pg. 13)<br />
•If the monitor is tilted<br />
upward 180 de<strong>gr</strong>ees, open<br />
the monitor fully. ( pg. 13)<br />
41. •Turn the speaker volume<br />
down. ( pg. 22)<br />
42. •Wipe them gently with soft<br />
cloth. Wiping strongly can<br />
cause damage. ( pg. 91)<br />
43. •Set “TIME CODE” to “ON”.<br />
( pg. 38, 49, 52)<br />
44. •Check the section of the<br />
manual that explains LCD<br />
monitor/viewfinder<br />
indications. ( pg. 96 – 99)<br />
45. •Remove the power supply<br />
(battery pack, etc.) and wait a<br />
few minutes for the<br />
indication to clear. When it<br />
does, you can resume using<br />
the camcorder.<br />
If the indication remains<br />
even though you repeat the<br />
above two or three times,<br />
please consult your nearest<br />
<strong>JVC</strong> dealer. Do not eject the<br />
cassette. This will cause<br />
damage to the tape.<br />
46. •Eject the cassette once and<br />
re-insert it, then check if the<br />
indication clears. When it<br />
does, you can resume using<br />
the camcorder.<br />
If the indication remains<br />
even though you repeat the<br />
above two or three times,<br />
please consult your nearest<br />
<strong>JVC</strong> dealer.


