

Flo-Ware Manual - Hachflow
Flo-Ware Manual - Hachflow
Flo-Ware Manual - Hachflow

Create successful ePaper yourself
Turn your PDF publications into a flip-book with our unique Google optimized e-Paper software.
Device communication<br />
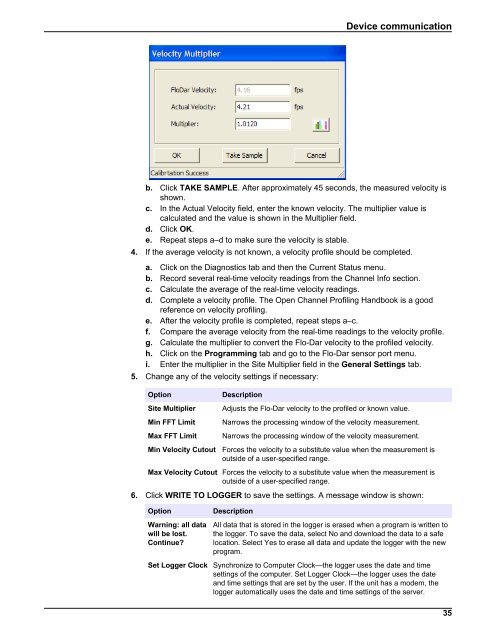
b. Click TAKE SAMPLE. After approximately 45 seconds, the measured velocity is<br />
shown.<br />
c. In the Actual Velocity field, enter the known velocity. The multiplier value is<br />
calculated and the value is shown in the Multiplier field.<br />
d. Click OK.<br />
e. Repeat steps a–d to make sure the velocity is stable.<br />
4. If the average velocity is not known, a velocity profile should be completed.<br />
a. Click on the Diagnostics tab and then the Current Status menu.<br />
b. Record several real-time velocity readings from the Channel Info section.<br />
c. Calculate the average of the real-time velocity readings.<br />
d. Complete a velocity profile. The Open Channel Profiling Handbook is a good<br />
reference on velocity profiling.<br />
e. After the velocity profile is completed, repeat steps a–c.<br />
f. Compare the average velocity from the real-time readings to the velocity profile.<br />
g. Calculate the multiplier to convert the <strong>Flo</strong>-Dar velocity to the profiled velocity.<br />
h. Click on the Programming tab and go to the <strong>Flo</strong>-Dar sensor port menu.<br />
i. Enter the multiplier in the Site Multiplier field in the General Settings tab.<br />
5. Change any of the velocity settings if necessary:<br />
Option<br />
Site Multiplier<br />
Min FFT Limit<br />
Max FFT Limit<br />
Min Velocity Cutout<br />
Description<br />
Adjusts the <strong>Flo</strong>-Dar velocity to the profiled or known value.<br />
Narrows the processing window of the velocity measurement.<br />
Narrows the processing window of the velocity measurement.<br />
Forces the velocity to a substitute value when the measurement is<br />
outside of a user-specified range.<br />
Max Velocity Cutout Forces the velocity to a substitute value when the measurement is<br />
outside of a user-specified range.<br />
6. Click WRITE TO LOGGER to save the settings. A message window is shown:<br />
Option<br />
Warning: all data<br />
will be lost.<br />
Continue?<br />
Description<br />
All data that is stored in the logger is erased when a program is written to<br />
the logger. To save the data, select No and download the data to a safe<br />
location. Select Yes to erase all data and update the logger with the new<br />
program.<br />
Set Logger Clock Synchronize to Computer Clock—the logger uses the date and time<br />
settings of the computer. Set Logger Clock—the logger uses the date<br />
and time settings that are set by the user. If the unit has a modem, the<br />
logger automatically uses the date and time settings of the server.<br />
35


