
Create successful ePaper yourself
Turn your PDF publications into a flip-book with our unique Google optimized e-Paper software.
CONNECTION AND SETUP<br />
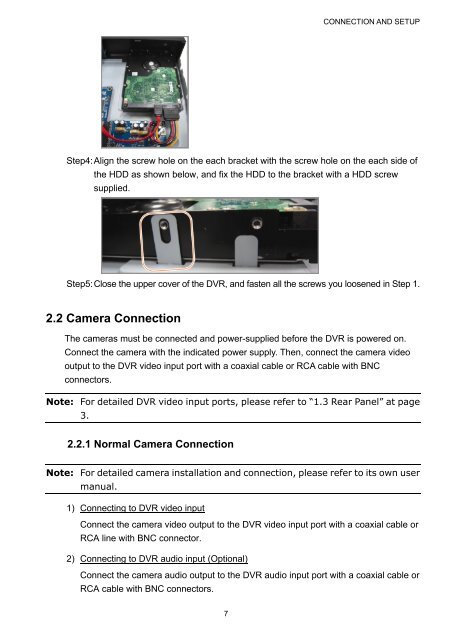
Step4: Align the screw hole on the each bracket with the screw hole on the each side of<br />
the HDD as shown below, and fix the HDD to the bracket with a HDD screw<br />
supplied.<br />
Step5: Close the upper cover of the <strong>DVR</strong>, and fasten all the screws you loosened in Step 1.<br />
2.2 Camera Connection<br />
The cameras must be connected and power-supplied before the <strong>DVR</strong> is powered on.<br />
Connect the camera with the indicated power supply. Then, connect the camera video<br />
output to the <strong>DVR</strong> video input port with a coaxial cable or RCA cable with BNC<br />
connectors.<br />
Note: For detailed <strong>DVR</strong> video input ports, please refer to “1.3 Rear Panel” at page<br />
3.<br />
2.2.1 Normal Camera Connection<br />
Note: For detailed camera installation and connection, please refer to its own user<br />
manual.<br />
1) Connecting to <strong>DVR</strong> video input<br />
Connect the camera video output to the <strong>DVR</strong> video input port with a coaxial cable or<br />
RCA line with BNC connector.<br />
2) Connecting to <strong>DVR</strong> audio input (Optional)<br />
Connect the camera audio output to the <strong>DVR</strong> audio input port with a coaxial cable or<br />
RCA cable with BNC connectors.<br />
7