
Create successful ePaper yourself
Turn your PDF publications into a flip-book with our unique Google optimized e-Paper software.
REMOTE OPERATION<br />
6. REMOTE OPERATION<br />
You can also control the <strong>DVR</strong> remotely via the supplied licensed software “Video Viewer”,<br />
Internet Explorer web browser, and Apple’s QuickTime player.<br />
6.1 Supplied Licensed Software<br />
The sections below describe frequently-used functions of the Video Viewer. For details<br />
about this software and network settings, please download its extended user manual<br />
from the following link:<br />
http://www.surveillance-download.com/user/CMS.pdf<br />
6.1.1 Installation & <strong>Network</strong> Connection<br />
1) Install the software<br />
Step1: Place the supplied CD into your CD-ROM or DVD-ROM drive. The program<br />
will be automatically run.<br />
Step2: Click “Download The Latest Version” under “Licensed Software AP” to<br />
download the latest version of Video Viewer from the Internet.<br />
Step3: Follow the on-screen instructions to finish the installation. When the<br />
installation is completed, a shortcut icon “ ” will be placed on your PC<br />
desktop.<br />
2) <strong>Network</strong> Connection<br />
‣ Local Connection (via LAN)<br />
LAN is used when it’s the first time to remotely access the <strong>DVR</strong> and you<br />
need to configure the network setting of your <strong>DVR</strong> based on your network<br />
type in advance.<br />
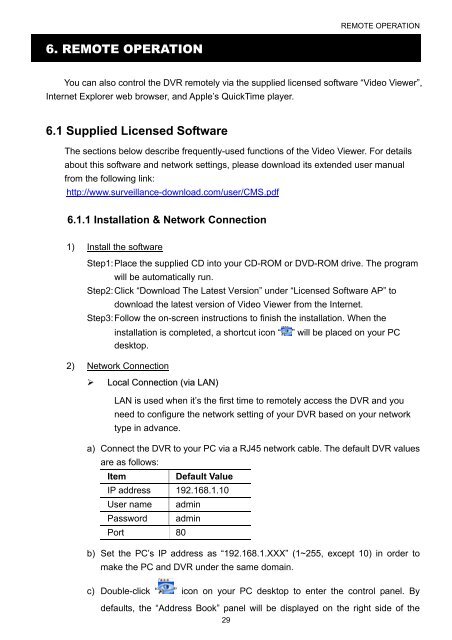
a) Connect the <strong>DVR</strong> to your PC via a RJ45 network cable. The default <strong>DVR</strong> values<br />
are as follows:<br />
Item<br />
Default Value<br />
IP address 192.168.1.10<br />
<strong>User</strong> name admin<br />
Password admin<br />
Port 80<br />
b) Set the PC’s IP address as “192.168.1.XXX” (1~255, except 10) in order to<br />
make the PC and <strong>DVR</strong> under the same domain.<br />
c) Double-click “ ” icon on your PC desktop to enter the control panel. By<br />
defaults, the “Address Book” panel will be displayed on the right side of the<br />
29