- Page 1: READ ALL INSTRUCTIONS COMPLETELY AN
- Page 5 and 6: DISCLAIMER OF WARRANTYPurchasers re
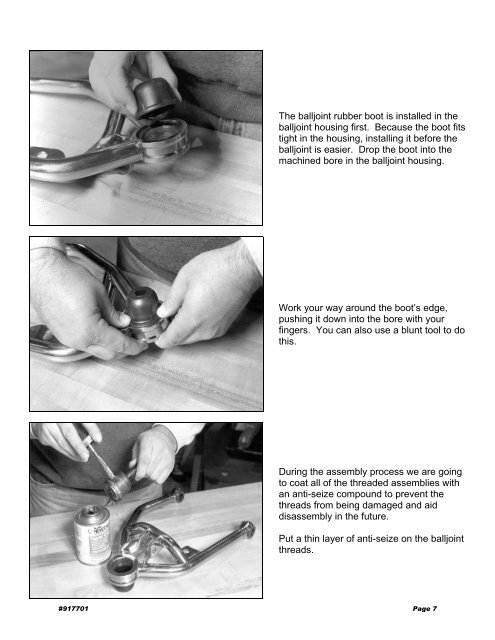
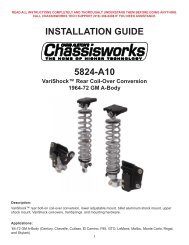
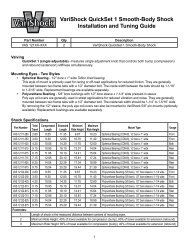
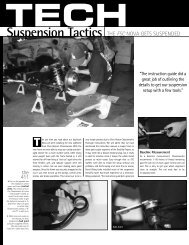
- Page 7: Installing SuspensionIn this sectio
- Page 11 and 12: Thread the balljoint in as far as p
- Page 16 and 17: A set screw is used to lock the A-a
- Page 19: Place the spindle over the lower ba
- Page 22: Now repeat the procedure for the ot
- Page 26: Install the tie rod end in the stee
- Page 30 and 31: Next, set the bar level and tighten
- Page 32 and 33: Next, you can final assemble the ti
- Page 34 and 35: The caps are held in place with the
- Page 36 and 37: With both bushings on the bar, brin
- Page 38 and 39: Next, slide the link eyebolt onto t
- Page 40 and 41: Use the T-handle Allen wrench to ti
- Page 42 and 43: Next, turn the shock over and tight
- Page 44 and 45: Installing BrakesThe 11 3/4 inch ve
- Page 46 and 47: After the bearing is packed, drop i
- Page 48 and 49: After the wheel bearings are tight,
- Page 50 and 51: Finally, bolt your wheel and tire o
- Page 52 and 53: Attach the tab to the frame rail wi
- Page 54 and 55: You can now final tighten the brake
- Page 56 and 57: Installation of a manual transmissi
- Page 58 and 59:
Use the stainless steel 3/8-16 x 1
- Page 60 and 61:
To install clutch linkage, bolt the
- Page 62 and 63:
These two photos show an engine and
- Page 64 and 65:
This is a view of the firewall befo
- Page 66 and 67:
Disconnect the steering column from
- Page 68 and 69:
Disconnect the brake line clamp by
- Page 70 and 71:
Remove the bolts that attach the ra
- Page 72 and 73:
Only slide the frame forward enough
- Page 74 and 75:
This photo shows the driver side fr
- Page 76 and 77:
The alignment pins slide up through
- Page 78 and 79:
Jack the clip up with the frame on
- Page 80 and 81:
The transmission crossmember isdesi
- Page 82 and 83:
After all dimensions verify, tighte
- Page 84 and 85:
Bend the rear brake line under the
- Page 86 and 87:
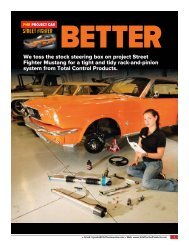
The first step to installing the st
- Page 88 and 89:
To install the 3/4” DD shaft, you
- Page 90 and 91:
Use a pair of needle nose pliers to
- Page 92 and 93:
Hold a 1x2 board across the top of
- Page 94 and 95:
After all of the rivets with backin
- Page 96 and 97:
It is best to install the headers i
- Page 98 and 99:
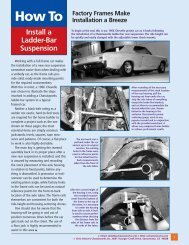
This is the driver side front leaf
- Page 100 and 101:
You will need two people for this s
- Page 102 and 103:
Remove the door sill plates to get
- Page 104 and 105:
Reattach the shock absorber, then m
- Page 106:
WARRANTY NOTICE:There are NO WARRAN