Program Directory for Realtime Monitor VM/ESA - z/VM - IBM
Program Directory for Realtime Monitor VM/ESA - z/VM - IBM
Program Directory for Realtime Monitor VM/ESA - z/VM - IBM
- No tags were found...
Create successful ePaper yourself
Turn your PDF publications into a flip-book with our unique Google optimized e-Paper software.
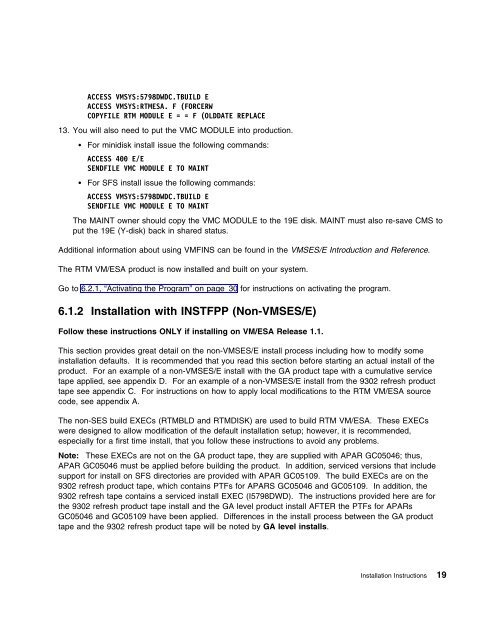
ACCESS <strong>VM</strong>SYS:5798DWDC.TBUILD EACCESS <strong>VM</strong>SYS:RTM<strong>ESA</strong>. F (FORCERWCOPYFILE RTM MODULE E = = F (OLDDATE REPLACE13. You will also need to put the <strong>VM</strong>C MODULE into production. For minidisk install issue the following commands:ACCESS 4 E/ESENDFILE <strong>VM</strong>C MODULE E TO MAINT For SFS install issue the following commands:ACCESS <strong>VM</strong>SYS:5798DWDC.TBUILD ESENDFILE <strong>VM</strong>C MODULE E TO MAINTThe MAINT owner should copy the <strong>VM</strong>C MODULE to the 19E disk. MAINT must also re-save CMS toput the 19E (Y-disk) back in shared status.Additional in<strong>for</strong>mation about using <strong>VM</strong>FINS can be found in the <strong>VM</strong>SES/E Introduction and Reference.The RTM <strong>VM</strong>/<strong>ESA</strong> product is now installed and built on your system.Go to 6.2.1, “Activating the <strong>Program</strong>” on page 30 <strong>for</strong> instructions on activating the program.6.1.2 Installation with INSTFPP (Non-<strong>VM</strong>SES/E)Follow these instructions ONLY if installing on <strong>VM</strong>/<strong>ESA</strong> Release 1.1.This section provides great detail on the non-<strong>VM</strong>SES/E install process including how to modify someinstallation defaults. It is recommended that you read this section be<strong>for</strong>e starting an actual install of theproduct. For an example of a non-<strong>VM</strong>SES/E install with the GA product tape with a cumulative servicetape applied, see appendix D. For an example of a non-<strong>VM</strong>SES/E install from the 9302 refresh producttape see appendix C. For instructions on how to apply local modifications to the RTM <strong>VM</strong>/<strong>ESA</strong> sourcecode, see appendix A.The non-SES build EXECs (RTMBLD and RTMDISK) are used to build RTM <strong>VM</strong>/<strong>ESA</strong>. These EXECswere designed to allow modification of the default installation setup; however, it is recommended,especially <strong>for</strong> a first time install, that you follow these instructions to avoid any problems.Note: These EXECs are not on the GA product tape, they are supplied with APAR GC05046; thus,APAR GC05046 must be applied be<strong>for</strong>e building the product. In addition, serviced versions that includesupport <strong>for</strong> install on SFS directories are provided with APAR GC05109. The build EXECs are on the9302 refresh product tape, which contains PTFs <strong>for</strong> APARS GC05046 and GC05109. In addition, the9302 refresh tape contains a serviced install EXEC (I5798DWD). The instructions provided here are <strong>for</strong>the 9302 refresh product tape install and the GA level product install AFTER the PTFs <strong>for</strong> APARsGC05046 and GC05109 have been applied. Differences in the install process between the GA producttape and the 9302 refresh product tape will be noted by GA level installs.Installation Instructions 19


