- Page 1 and 2: GV-IPCam H.264User's ManualBefore a
- Page 3 and 4: Safety NoticeFCC Compliance for GV-
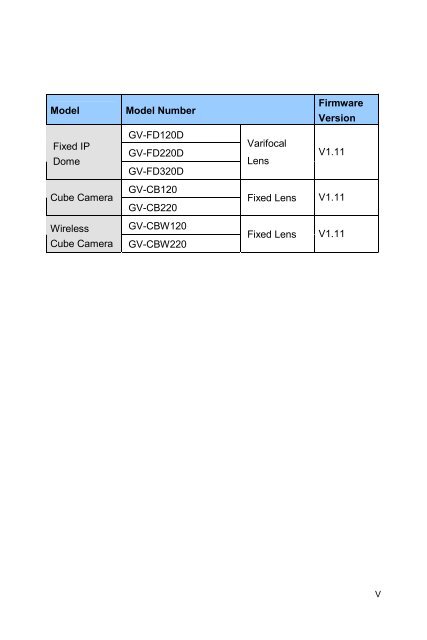
- Page 5: ModelIR Arctic BoxCameraModel Numbe
- Page 9 and 10: Chapter 3 IR Arctic Box Camera ....
- Page 11 and 12: 7.3 Overview.......................
- Page 13 and 14: 12.2.6 Picture-in-Picture and Pictu
- Page 15 and 16: Chapter 15 Advanced Applications ..
- Page 17 and 18: Specifications: Bullet Camera .....
- Page 19 and 20: OptionsOptional devices can expand
- Page 21 and 22: Note for Adjusting Focus andZoomWhe
- Page 23: 3. After opening the camera cover,
- Page 26 and 27: Model Model No. DescriptionGV-BX220
- Page 28 and 29: Model Model No. DescriptionMini Fix
- Page 30 and 31: Model Model No. DescriptionCubeCame
- Page 32 and 33: Chapter 2 Box CameraThe Box Camera
- Page 34 and 35: 2.1 Packing ListBox CameraTerminal
- Page 36 and 37: Support for iPhone, iPad, Android a
- Page 38 and 39: No. Name Description1 Audio Out Con
- Page 40 and 41: 2.3.2 GV-BX120D / 130D Series / 140
- Page 42 and 43: 2.4 Connecting the CameraThe Box Ca
- Page 44 and 45: 2.4.2 GV-BX120D / 130D Series / 140
- Page 46 and 47: 2.5 Accessory Installation2.5.1 C-M
- Page 48 and 49: 2.5.2 Infrared Illuminators (Option
- Page 50 and 51: • GV-BX120D / 130D Series / 140DW
- Page 52 and 53: To connect the Box Camera to GV-Rel
- Page 54 and 55: 3.1 Packing List IR Arctic Box Came
- Page 56 and 57:
3.3 OverviewFigure 3-1Note: The Iri
- Page 58 and 59:
Tilt AdjustmentFigure 3-4Pan Adjust
- Page 60 and 61:
8. Replace the silica gel bag. Past
- Page 62 and 63:
3. Connect the camera’s cable to
- Page 64 and 65:
3.6.2 Disabling Status LED under Lo
- Page 66 and 67:
4.1 Packing List Mini Fixed Dome or
- Page 68 and 69:
Day and night function (electronic)
- Page 70 and 71:
4.3.2 GV-MFD120 / 130 / 220 / 320 /
- Page 72 and 73:
No. Name Description7 Built-In Micr
- Page 74 and 75:
Tilt AdjustmentFigure 4-58. For GV-
- Page 76 and 77:
7. Access the live view. For detail
- Page 78 and 79:
4.5 Connecting the CameraRefer to t
- Page 80 and 81:
4.5.3 Vehicle InstallationTo instal
- Page 82 and 83:
5.1 Packing List Bullet Camera Lens
- Page 84 and 85:
5.3 Overview1 2 3 4Figure 5-1No. Na
- Page 86 and 87:
5. Access the live view. For detail
- Page 88 and 89:
Voltage Load Expansion (Optional)Th
- Page 90 and 91:
5.4.2 Adjusting the AnglesThe Bulle
- Page 92 and 93:
3. Adjust the angle of camera body
- Page 94 and 95:
5.4.3 Adjusting Lens and Inserting
- Page 96 and 97:
5.4.4 Installing the Sun-Shield Cov
- Page 98 and 99:
6.1 Packing List GV-PTZ010D Mounti
- Page 100 and 101:
6.3 OverviewFigure 6-1No. Name Desc
- Page 102 and 103:
6.4 InstallationThe GV-PTZ010D / GV
- Page 104 and 105:
6.4.2 L-Shaped Wall MountYou may wa
- Page 106 and 107:
With Mounting Cover• To install t
- Page 108 and 109:
6.6 Focus AdjustmentOn initial inst
- Page 110 and 111:
6.7.2 Voltage Load Expansion (Optio
- Page 112 and 113:
Buttons on the PTZ control panel:No
- Page 114 and 115:
• PT Speed: Determines the pannin
- Page 116 and 117:
• AWB: Automatic White Balance (A
- Page 118 and 119:
6.8.5 Preset SettingsFor PTZ Camera
- Page 120 and 121:
Starting and Stopping a Preset Poin
- Page 122 and 123:
5 Use the Preset drop-down list to
- Page 124 and 125:
Configuring the Speed of Auto PanYo
- Page 126 and 127:
6.8.8 System ConfigurationTo config
- Page 128 and 129:
DC 12V Power Adapter Washer x 3 GV
- Page 130 and 131:
7.3 OverviewFigure 7-1No. Name Desc
- Page 132 and 133:
7.4 InstallationFor installation pr
- Page 134 and 135:
7.8 PT ControlThe GV-PT110D shares
- Page 136 and 137:
Chapter 8 Vandal Proof IP DomeThe V
- Page 138 and 139:
8.2 Features1/3’’ progressive s
- Page 140 and 141:
8.4 InstallationThe Vandal Proof IP
- Page 142 and 143:
2. Mark the position of four screw
- Page 144 and 145:
Rotational AdjustmentFigure 8-710.
- Page 146 and 147:
4. Screw in a plastic clip to the b
- Page 148 and 149:
8.5 Connecting the CameraConnect yo
- Page 150 and 151:
8.5.3 Voltage Load Expansion (Optio
- Page 152 and 153:
9.1 Packing List9.1.1 Packing List
- Page 154 and 155:
9.2 Features1/3’’ progressive s
- Page 156 and 157:
No. Name Description12 I/O Terminal
- Page 158 and 159:
Take out thecamera bodyFigure 9-43.
- Page 160 and 161:
Rotational AdjustmentFigure 9-87. A
- Page 162 and 163:
4. From the side with the numbering
- Page 164 and 165:
12. Access the live view. See 11.1
- Page 166 and 167:
5. Access the live view. See 11.1 A
- Page 168 and 169:
9.6 I/O Terminal BlockThe terminal
- Page 170 and 171:
Chapter 10 Cube & WirelessCameraThe
- Page 172 and 173:
10.2 Features• 1/2.5’’ progre
- Page 174 and 175:
10.4 InstallationFollow the steps b
- Page 176 and 177:
10.5 Connecting the Camera1 2Figure
- Page 178 and 179:
Camera Type &Default Connection Typ
- Page 180 and 181:
3. Find the camera with its Mac Add
- Page 182 and 183:
Important:1. If Dynamic IP Address
- Page 184 and 185:
C. Select Ad-Hoc or Infrastructure
- Page 186 and 187:
11.2 Adjusting Image ClarityNote th
- Page 188 and 189:
4. Type the user name and password
- Page 190 and 191:
Do not leave a distance betweenthe
- Page 192 and 193:
ModelsAdjustment ScrewsPT CameraVan
- Page 194 and 195:
Chapter 12 Accessing the CameraTwo
- Page 196 and 197:
12.2 Functions Featured on the Main
- Page 198 and 199:
No. Name5 Snapshot6 File Save7 Full
- Page 200 and 201:
12.2.2 The Control Panel of the Liv
- Page 202 and 203:
178Figure 12-6
- Page 204 and 205:
Shutter Speed Balanced QualityImage
- Page 206 and 207:
12.2.5 Wide Angle DewarppingThe liv
- Page 208 and 209:
Picture-and-Picture ViewWith the Pi
- Page 210 and 211:
12.2.7 Alarm NotificationAfter inpu
- Page 212 and 213:
12.2.8 Video and Audio Configuratio
- Page 214 and 215:
12.2.12 Visual PTZNote this feature
- Page 216 and 217:
Setting Visual PTZ PanelClick thefo
- Page 218 and 219:
12.2.14 Visual AutomationNote this
- Page 220 and 221:
Chapter 13 Administrator ModeThe Ad
- Page 222 and 223:
13.1 Video and MotionThe GV-IPCAM H
- Page 224 and 225:
Figure 13-2B[Name] Rename the video
- Page 226 and 227:
[Record Settings] The alarm setting
- Page 228 and 229:
[Mechanical Iris Adjustment] Note t
- Page 230 and 231:
13.1.2 Motion DetectionNote for mod
- Page 232 and 233:
13.1.3 Privacy MaskThe Privacy Mask
- Page 234 and 235:
7. Click Save to apply the settings
- Page 236 and 237:
To configure the tampering alarm:1.
- Page 238 and 239:
3. Assign the connected module and
- Page 240 and 241:
• Normal State: You can set the i
- Page 242 and 243:
13.2.3 PTZ SettingsNote this functi
- Page 244 and 245:
13.3.1 E-mailAfter a trigger event,
- Page 246 and 247:
13.3.2 FTPYou can also send the cap
- Page 248 and 249:
When you are prompted for Username
- Page 250 and 251:
To enable the Center V2 connection:
- Page 252 and 253:
To enable the VSM connection:1. Act
- Page 254 and 255:
To enable connection to GV-Backup C
- Page 256 and 257:
13.3.6 Video Gateway / Recording Se
- Page 258 and 259:
6. Enable Schedule mode: Enable the
- Page 260 and 261:
13.3.8 RTSPThe RTSP enables video a
- Page 262 and 263:
[Camera Status Icon]: On standby: E
- Page 264 and 265:
13.5.2 I/O Monitoring SettingsNote
- Page 266 and 267:
13.7 NetworkThe Network section inc
- Page 268 and 269:
13.7.2 Wireless Client ModeNote thi
- Page 270 and 271:
13.7.3 Advanced TCP/IPThis section
- Page 272 and 273:
[HTTPS Settings] By enabling the Hy
- Page 274 and 275:
13.7.4 IP Filter SettingsThe Admini
- Page 276 and 277:
1. Select Enable SNMPv1 SNMPv2c to
- Page 278 and 279:
[Date & Time on GV-IP Camera] Displ
- Page 280 and 281:
4. Click Open. A warning message ap
- Page 282 and 283:
[Disk Information]This section show
- Page 284 and 285:
13.8.5 Log InformationThe log infor
- Page 286 and 287:
4. Click Query. The filtering resul
- Page 288 and 289:
[Host Settings] Enter a descriptive
- Page 290 and 291:
14.2 PlaybackThese methods are avai
- Page 292 and 293:
14.2.2 Playback over NetworkWith th
- Page 294 and 295:
2. To remotely connect to the camer
- Page 296 and 297:
6. Do not turn the power off within
- Page 298 and 299:
15.1.2 Using the IP Device UtilityT
- Page 300 and 301:
15.2 Backing Up and Restoring Setti
- Page 302 and 303:
15.3 Restoring to Factory Default S
- Page 304 and 305:
Mini Fixed Dome• GV-MFD1101. Unpl
- Page 306 and 307:
Bullet Camera• GV-BL110D1. Loosen
- Page 308 and 309:
• PTZ and PT CameraThere are two
- Page 310 and 311:
3. When the status LED fades, the p
- Page 312 and 313:
15.4 Verifying WatermarkThe waterma
- Page 314 and 315:
15.4.2 Running Watermark Proof1. In
- Page 316 and 317:
15.5 Downloading Videos from the SD
- Page 318 and 319:
3. To configure synchronization, ne
- Page 320 and 321:
[Recycle]• Recycle when the stora
- Page 322 and 323:
Note:1. The synchronization time is
- Page 324 and 325:
16 DVR ConfigurationsCameraMini Fix
- Page 326 and 327:
16 DVR Configurations• When a GV-
- Page 328 and 329:
16 DVR Configurations2. Click Add C
- Page 330 and 331:
16 DVR Configurations16.1.1 Customi
- Page 332 and 333:
16 DVR Configurations16.2 Remote Mo
- Page 334 and 335:
16 DVR Configurations7. Click OK to
- Page 336 and 337:
17CMS configurations• To set the
- Page 338 and 339:
17CMS configurations17.2 VSMThe VSM
- Page 340 and 341:
17CMS configurations• To set the
- Page 342 and 343:
18Mobile Phone ConnectionAndroid V1
- Page 344 and 345:
18Mobile Phone Connection18.1.2 Act
- Page 346 and 347:
18Mobile Phone Connection2. Click t
- Page 348 and 349:
18Mobile Phone Connection18.1.5 Oth
- Page 350 and 351:
18Mobile Phone ConnectionThe number
- Page 352 and 353:
18Mobile Phone ConnectionButtonDesc
- Page 354 and 355:
18Mobile Phone Connection18.2.2 Act
- Page 356 and 357:
18Mobile Phone Connection3. On the
- Page 358 and 359:
18Mobile Phone Connection18.2.5 Oth
- Page 360 and 361:
18Mobile Phone Connection18.3.2 Act
- Page 362 and 363:
18Mobile Phone Connection18.3.4 Qui
- Page 364 and 365:
18Mobile Phone Connection18.4 3G Mo
- Page 366 and 367:
18Mobile Phone Connection3. Select
- Page 368 and 369:
18Mobile Phone Connection18.5.1 Con
- Page 370 and 371:
18Mobile Phone Connection8. The fol
- Page 372 and 373:
18Mobile Phone Connection18.6.2 Con
- Page 374 and 375:
18Mobile Phone Connection6. The fol
- Page 376 and 377:
Specifications: Box CameraGV-BX120D
- Page 378 and 379:
Specifications: Box CameraFixed Foc
- Page 380 and 381:
Specifications: Box CameraAngle ofV
- Page 382 and 383:
Specifications: Box CameraVideo Res
- Page 384 and 385:
Specifications: Box CameraMechanica
- Page 386 and 387:
Specifications: Box CameraGeneralOp
- Page 388 and 389:
Specifications: Box CameraApplicati
- Page 390 and 391:
Specifications: IR Arctic Box Camer
- Page 392 and 393:
Specifications: IR Arctic Box Camer
- Page 394 and 395:
Specifications: IR Arctic Box Camer
- Page 396 and 397:
Specifications: IR Arctic Box Camer
- Page 398 and 399:
Specifications: Mini Fixed & Rugged
- Page 400 and 401:
Specifications: Mini Fixed & Rugged
- Page 402 and 403:
Specifications: Mini Fixed & Rugged
- Page 404 and 405:
Specifications: Mini Fixed & Rugged
- Page 406 and 407:
Specifications: Mini Fixed & Rugged
- Page 408 and 409:
Specifications: Mini Fixed & Rugged
- Page 410 and 411:
Specifications: Mini Fixed & Rugged
- Page 412 and 413:
Specifications: Bullet CameraShutte
- Page 414 and 415:
Specifications: Bullet CameraImage
- Page 416 and 417:
Specifications: Bullet CameraMechan
- Page 418 and 419:
Specifications: Bullet CameraApplic
- Page 420 and 421:
Specifications: PTZ CameraOperation
- Page 422 and 423:
Specifications: PTZ CameraPower ove
- Page 424 and 425:
Specifications: PT CameraSpecificat
- Page 426 and 427:
Specifications: PT CameraNetworkInt
- Page 428 and 429:
Specifications: PT CameraLanguageBu
- Page 430 and 431:
Specifications: Vandal Proof IP Dom
- Page 432 and 433:
Specifications: Vandal Proof IP Dom
- Page 434 and 435:
Specifications: Vandal Proof IP Dom
- Page 436 and 437:
Specifications: Vandal Proof IP Dom
- Page 438 and 439:
Specifications: Fixed IP DomeLensMe
- Page 440 and 441:
Specifications: Fixed IP DomeGV-FD2
- Page 442 and 443:
Specifications: Fixed IP DomePower
- Page 444 and 445:
Specifications: Cube & Wireless Cub
- Page 446 and 447:
Specifications: Cube & Wireless Cub
- Page 448 and 449:
Specifications: Cube & Wireless Cub
- Page 450 and 451:
AppendixB. Supported Lenses for Box
- Page 452 and 453:
AppendixGV-IP Camera Stream Ratio R
- Page 454 and 455:
AppendixGV-IP Camera Stream Ratio R
- Page 456 and 457:
AppendixD. Support Lists• Support
- Page 458 and 459:
Appendix• Support List for Transm
- Page 460 and 461:
Appendix• Support List for System
- Page 462 and 463:
AppendixE. RTSP Protocol CommandThe
- Page 464 and 465:
AppendixYou can use the CGI command
- Page 466 and 467:
AppendixGV-IP CameraGV-BX130D Serie
- Page 468 and 469:
AppendixH. Power Supply Support Lis