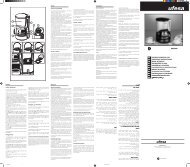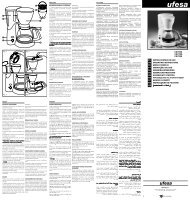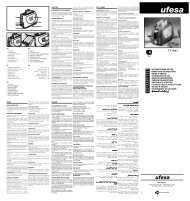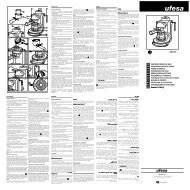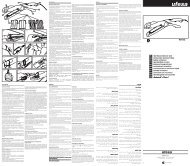
ck7360 es instrucciones de uso gb operating instructions fr mode d ...
ck7360 es instrucciones de uso gb operating instructions fr mode d ...
ck7360 es instrucciones de uso gb operating instructions fr mode d ...

Create successful ePaper yourself
Turn your PDF publications into a flip-book with our unique Google optimized e-Paper software.
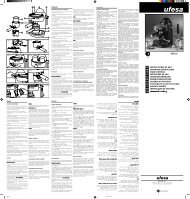
4. Fit the filter hol<strong>de</strong>r into its housing (fig. 9). Turn the<br />
filter hol<strong>de</strong>r to the right until it stops. Do not force it.<br />
5. To prepare coffee, pr<strong>es</strong>s the ON/OFF switch (12)<br />
(figure 10). The red ON lamp (13) will light up. When<br />
the green temperature reached lamp (17) lights up,<br />
the coffee maker will have reached the right<br />
temperature to make the coffee.<br />
Pr<strong>es</strong>s the <strong>es</strong>pr<strong>es</strong>so switch (16) (figure 13) to activate<br />
the coffee outlet. Pr<strong>es</strong>s the <strong>es</strong>pr<strong>es</strong>so switch (16) again<br />
in or<strong>de</strong>r to stop the coffee <strong>fr</strong>om flowing.<br />
Attention: Do not release the filter hol<strong>de</strong>r (20) while<br />
the switch (16) is still ON.<br />
6. Thanks to the appliance’s self-priming system there<br />
is no special procedure required when the water tank<br />
runs dry or if the coffee maker is not used for<br />
prolonged periods.<br />
PREPARING CAPPUCCINO<br />
The steam can be used to preheat cups, warm liquids<br />
or prepare cappuccino coffee. A cappuccino is<br />
<strong>es</strong>pr<strong>es</strong>so coffee with a little milk and a layer of <strong>fr</strong>oth.<br />
This <strong>fr</strong>oth ma<strong>de</strong> with cold milk in a jug, using the steam<br />
nozzle and then ad<strong>de</strong>d to the <strong>es</strong>pr<strong>es</strong>so coffee.<br />
In or<strong>de</strong>r to avoid exc<strong>es</strong>s pr<strong>es</strong>sure on the insi<strong>de</strong> of<br />
the filter, it is advisable to remove the filter hol<strong>de</strong>r<br />
before using the steam.<br />
Make sure that button (12) is ON (fig. 10).<br />
Next, pr<strong>es</strong>s the steam function switch (14) (figure 11)<br />
and you will see the function lamp (15) light up. When<br />
the green pilot lamp (17) lights up, this indicat<strong>es</strong> that<br />
steam has reached the right temperature.<br />
1. Turn the steam regulator knob (11) clockwise, (fig.<br />
14) and place a container below the steam nozzle<br />
(21) (figure 15). When the water insi<strong>de</strong> the pipe<br />
finish<strong>es</strong> coming out, place the nozzle insi<strong>de</strong> the jug<br />
of milk and turn the steam control knob again so that<br />
steam com<strong>es</strong> out.<br />
2. Lift the jug up and down slightly. Try not to let the<br />
liquid go above the top of the nozzle as this will<br />
prevent air <strong>fr</strong>om entering. To obtain <strong>fr</strong>othy milk, place<br />
the steam pipe just on the surface of the milk.<br />
3. Add the <strong>fr</strong>othy milk to the coffee. If you want you<br />
can sprinkle it with cinnamon, nutmeg or grated<br />
chocolate and <strong>de</strong>corate it with a stick of cinnamon.<br />
Important: Clean the nozzle of any leftover milk when<br />
you have finished preparing the <strong>fr</strong>othy milk. It is<br />
advisable to give the nozzle a quick burst of steam<br />
to clean it out.<br />
4. Clean the steam nozzle regularly but always with<br />
the appliance unplugged and cold (fig. 19). Remove<br />
the acc<strong>es</strong>sory <strong>fr</strong>om the steam pipe and clean the<br />
outsi<strong>de</strong> of the nozzle with a soft damp cloth. The<br />
acc<strong>es</strong>sory can be washed un<strong>de</strong>r the tap.<br />
FROM CAPPUCCINO TO COFFEE AGAIN<br />
Pr<strong>es</strong>s the steam pr<strong>es</strong>sure switch (14) to switch the<br />
steam off and the indicator lamp (15) will go out,<br />
allowing the coffee maker to cool down.<br />
Place a container below the steam nozzle (21), turn<br />
the steam regulator knob (11) allowing any r<strong>es</strong>idual<br />
steam to <strong>es</strong>cape. As soon as steam stops coming<br />
out through the nozzle, close the steam regulator<br />
knob (11) (figure 17)<br />
The coffee maker is now ready to make coffee again.<br />
HOW TO PREPARE TEA OR HOT DRINKS<br />
Pr<strong>es</strong>s the ON/OFF switch (12), the ON lamp (13) will<br />
light up. When the green temperature reached lamp<br />
(17) lights up, the coffee maker will have reached<br />
the right temperature.<br />
Place a cup below the steam nozzle (21) and pr<strong>es</strong>s<br />
the coffee outlet switch (16). At the same time, turn<br />
the steam control (11) so that hot water com<strong>es</strong> out<br />
through the steam nozzle (21).<br />
When you have finished, close the steam outlet and<br />
switch the <strong>es</strong>pr<strong>es</strong>so coffee maker off by pr<strong>es</strong>sing the<br />
ON/OFF switch (12).<br />
CLEANING & MAINTENANCE<br />
Make sure that the coffee maker is unplugged and<br />
cold before attempting to clean it. Any moving parts<br />
can be washed with soapy water.<br />
Never immerse the coffee maker in water or any other<br />
liquid.<br />
Use a damp cloth to periodically wipe clean the area<br />
where the filter hol<strong>de</strong>r sits, in or<strong>de</strong>r to remove any<br />
leftover coffee that may have become stuck to it.<br />
Remove the filter hol<strong>de</strong>r with care as it may still contain<br />
some hot water.<br />
Do not replace the filter hol<strong>de</strong>r if you are not gong to<br />
use the coffee maker for a while, as this will help the<br />
rubber seal last longer. Do not wash any of the parts<br />
in the dishwasher.<br />
DESCALING<br />
The coffee maker should be d<strong>es</strong>caled regularly.<br />
Frequency will <strong>de</strong>pend on water hardn<strong>es</strong>s and use.<br />
To do this, fill the water tank (9) with a mix of three<br />
parts water to one part vinegar.<br />
A) D<strong>es</strong>caling the drip feed coffee maker<br />
1. Place the empty jug (2) on the hot plate (1).<br />
2. Switch the coffee maker on for one minute.<br />
Switch it off and let it stand for half an hour.<br />
3. Switch the coffee maker back on so that all the<br />
water/vinegar solution flows out.<br />
Throw this away and clean out the jug.<br />
4. To flush out any trac<strong>es</strong> of vinegar, run the dripfeed<br />
coffee maker through two more cycl<strong>es</strong> but using<br />
only water.<br />
B) D<strong>es</strong>caling the <strong>es</strong>pr<strong>es</strong>so coffee maker<br />
1. Run the appliance through two brewing cycl<strong>es</strong>,<br />
including the steam nozzle.<br />
2. Then, to flush out any trac<strong>es</strong> of vinegar, run it<br />
through twice more using just water.<br />
REPAIRS<br />
Should the appliance become <strong>de</strong>fective, do not<br />
h<strong>es</strong>itate in taking it along to an Authorised Technical<br />
Service Centre.<br />
ADVICE ON DISPOSAL<br />
Our goods come in optimised packaging. This<br />
basically consists in using non-contaminating<br />
materials which should be han<strong>de</strong>d over to the local<br />
waste disposal service as secondary raw materials.<br />
Your local town council can provi<strong>de</strong> you with<br />
information on how to dispose of obsolete<br />
applianc<strong>es</strong>.<br />
CK7360-2 12<br />
23/4/04, 11:25