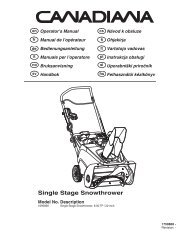
Instruction Book - Snowthrower Model 6210701x54NA ... - Canadiana
Instruction Book - Snowthrower Model 6210701x54NA ... - Canadiana
Instruction Book - Snowthrower Model 6210701x54NA ... - Canadiana

You also want an ePaper? Increase the reach of your titles
YUMPU automatically turns print PDFs into web optimized ePapers that Google loves.
CONTENTS<br />
HAZARD SYMBOLS AND THE MEANINGS .......... 8<br />
OPERATING SYMBOLS AND THEIR MEANINGS ..... 8<br />
RULES FOR SAFE OPERATION .................... 9<br />
ASSEMBLY ...................................... 11<br />
OPERATION ..................................... 11<br />
MAINTENANCE .................................. 13<br />
MAINTENANCE CHART ........................... 13<br />
TROUBLE SHOOTING CHART ..................... 15<br />
LIMITED WARRANTY ............................. 16<br />
General Information<br />
This instruction book is written for a person with some mechanical ability.<br />
Like most service books, not all the steps are described. Steps on how to<br />
loosen or tighten fasteners are steps anyone can follow with some<br />
mechanical ability. Read and follow these instructions before you use the<br />
unit.<br />
Know your product: If you understand the unit and how the unit<br />
operates, you will get the best performance. As you read this manual,<br />
compare the illustrations to the unit. Learn the location and the function of<br />
the controls. To help prevent an accident, follow the operating instructions<br />
and the safety rules. Keep this manual for future reference.<br />
IMPORTANT: Many units are not assembled and are sold in cartons. It is<br />
the responsibility of the owner to make sure the assembly instructions in<br />
this manual are exactly followed. Other units are purchased in an<br />
assembled condition. On assembled units, it is the responsibility of the<br />
owner to make sure the unit is correctly assembled. The owner must<br />
carefully check the unit according to the instructions in this manual before<br />
it is first used.<br />
Controls & Equipment Features (see Figure 1)<br />
en<br />
Crank Assembly (2) - Changes the direction of the discharge chute.<br />
Chute Deflector (3) - Changes the distance the snow is thrown.<br />
Discharge Chute (4) - Changes the direction the snow is thrown.<br />
Auger Drive Lever (5) - Starts and stops the auger (snow gathering and<br />
throwing) which also propels the snowthrower..<br />
Engine Features<br />
Stop Switch (8) - If equipped, move to the ON position to start the<br />
engine.<br />
Primer Button (9) - Injects fuel directly into the carburetor for fast starts<br />
in cold weather.<br />
Recoil Starter Handle (12) - Use to manually start the engine.<br />
Choke Control (14) - Use to start a cold engine.<br />
1741413<br />
7