Civil engineer guide to fighting positions, shelters, obstacles
Civil engineer guide to fighting positions, shelters, obstacles
Civil engineer guide to fighting positions, shelters, obstacles

You also want an ePaper? Increase the reach of your titles
YUMPU automatically turns print PDFs into web optimized ePapers that Google loves.
AFH 10-222 Volume 14 1 August 2008 111<br />
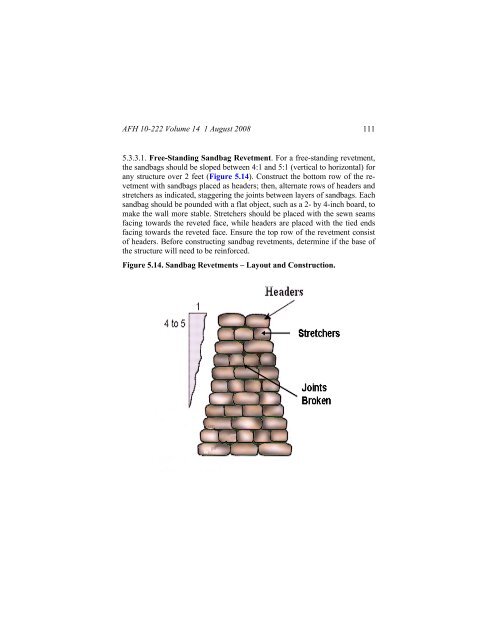
5.3.3.1. Free-Standing Sandbag Revetment. For a free-standing revetment,<br />
the sandbags should be sloped between 4:1 and 5:1 (vertical <strong>to</strong> horizontal) for<br />
any structure over 2 feet (Figure 5.14). Construct the bot<strong>to</strong>m row of the revetment<br />
with sandbags placed as headers; then, alternate rows of headers and<br />
stretchers as indicated, staggering the joints between layers of sandbags. Each<br />
sandbag should be pounded with a flat object, such as a 2- by 4-inch board, <strong>to</strong><br />
make the wall more stable. Stretchers should be placed with the sewn seams<br />
facing <strong>to</strong>wards the reveted face, while headers are placed with the tied ends<br />
facing <strong>to</strong>wards the reveted face. Ensure the <strong>to</strong>p row of the revetment consist<br />
of headers. Before constructing sandbag revetments, determine if the base of<br />
the structure will need <strong>to</strong> be reinforced.<br />
Figure 5.14. Sandbag Revetments – Layout and Construction.