Civil engineer guide to fighting positions, shelters, obstacles
Civil engineer guide to fighting positions, shelters, obstacles
Civil engineer guide to fighting positions, shelters, obstacles
You also want an ePaper? Increase the reach of your titles
YUMPU automatically turns print PDFs into web optimized ePapers that Google loves.
AFH 10-222 Volume 14 1 August 2008 3<br />
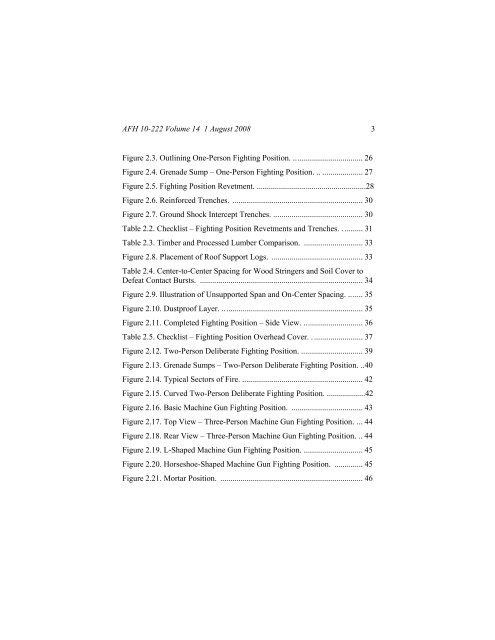
Figure 2.3. Outlining One-Person Fighting Position. .................................. 26<br />
Figure 2.4. Grenade Sump – One-Person Fighting Position. .. .................... 27<br />
Figure 2.5. Fighting Position Revetment. ......................................................28<br />
Figure 2.6. Reinforced Trenches. ................................................................ 30<br />
Figure 2.7. Ground Shock Intercept Trenches. ............................................ 30<br />
Table 2.2. Checklist – Fighting Position Revetments and Trenches. . ......... 31<br />
Table 2.3. Timber and Processed Lumber Comparison. ............................. 33<br />
Figure 2.8. Placement of Roof Support Logs. ............................................. 33<br />
Table 2.4. Center-<strong>to</strong>-Center Spacing for Wood Stringers and Soil Cover <strong>to</strong><br />
Defeat Contact Bursts. ................................................................................ 34<br />
Figure 2.9. Illustration of Unsupported Span and On-Center Spacing. ....... 35<br />
Figure 2.10. Dustproof Layer. ..................................................................... 35<br />
Figure 2.11. Completed Fighting Position – Side View. ............................. 36<br />
Table 2.5. Checklist – Fighting Position Overhead Cover. . ........................ 37<br />
Figure 2.12. Two-Person Deliberate Fighting Position. .............................. 39<br />
Figure 2.13. Grenade Sumps – Two-Person Deliberate Fighting Position. ..40<br />
Figure 2.14. Typical Sec<strong>to</strong>rs of Fire. ........................................................... 42<br />
Figure 2.15. Curved Two-Person Deliberate Fighting Position. ...................42<br />
Figure 2.16. Basic Machine Gun Fighting Position. ................................... 43<br />
Figure 2.17. Top View – Three-Person Machine Gun Fighting Position. ... 44<br />
Figure 2.18. Rear View – Three-Person Machine Gun Fighting Position. .. 44<br />
Figure 2.19. L-Shaped Machine Gun Fighting Position. ............................. 45<br />
Figure 2.20. Horseshoe-Shaped Machine Gun Fighting Position. .............. 45<br />
Figure 2.21. Mortar Position. ...................................................................... 46


