Civil engineer guide to fighting positions, shelters, obstacles
Civil engineer guide to fighting positions, shelters, obstacles
Civil engineer guide to fighting positions, shelters, obstacles

Create successful ePaper yourself
Turn your PDF publications into a flip-book with our unique Google optimized e-Paper software.
AFH 10-222 Volume 14 1 August 2008 52<br />
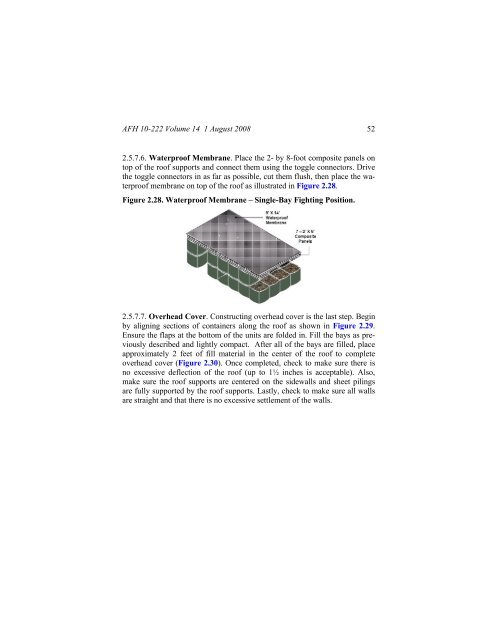
2.5.7.6. Waterproof Membrane. Place the 2- by 8-foot composite panels on<br />
<strong>to</strong>p of the roof supports and connect them using the <strong>to</strong>ggle connec<strong>to</strong>rs. Drive<br />
the <strong>to</strong>ggle connec<strong>to</strong>rs in as far as possible, cut them flush, then place the waterproof<br />
membrane on <strong>to</strong>p of the roof as illustrated in Figure 2.28.<br />
Figure 2.28. Waterproof Membrane – Single-Bay Fighting Position.<br />
2.5.7.7. Overhead Cover. Constructing overhead cover is the last step. Begin<br />
by aligning sections of containers along the roof as shown in Figure 2.29.<br />
Ensure the flaps at the bot<strong>to</strong>m of the units are folded in. Fill the bays as previously<br />
described and lightly compact. After all of the bays are filled, place<br />
approximately 2 feet of fill material in the center of the roof <strong>to</strong> complete<br />
overhead cover (Figure 2.30). Once completed, check <strong>to</strong> make sure there is<br />
no excessive deflection of the roof (up <strong>to</strong> 1½ inches is acceptable). Also,<br />
make sure the roof supports are centered on the sidewalls and sheet pilings<br />
are fully supported by the roof supports. Lastly, check <strong>to</strong> make sure all walls<br />
are straight and that there is no excessive settlement of the walls.