Perkins L4 Workshop Manual - L-36 Fleet
Perkins L4 Workshop Manual - L-36 Fleet
Perkins L4 Workshop Manual - L-36 Fleet
Create successful ePaper yourself
Turn your PDF publications into a flip-book with our unique Google optimized e-Paper software.
'-<br />
~<br />
,.<br />
,<br />
, ..,<br />
~<br />
.,<br />
1<br />
..,<br />
-1 -<br />
~<br />
-,<br />
-,<br />
J -<br />
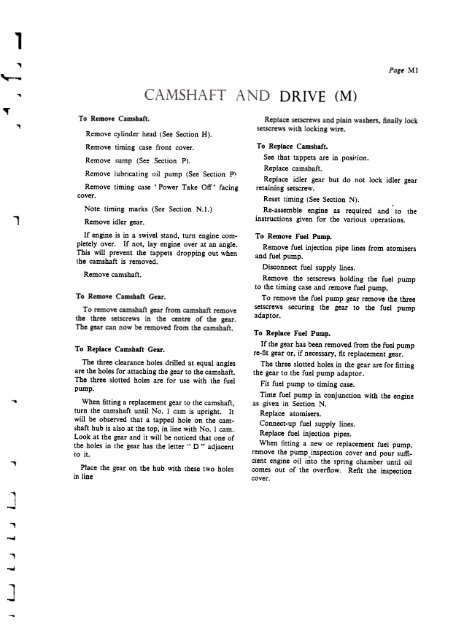
DRIVE<br />
(M)<br />
Page M]<br />
To Remove Camshaft. Replace setscrews and plaiD washers, finally lock<br />
Remove cylinder head (See Section H).<br />
setscrews with locking wire.<br />
Remove timing case front cover.<br />
Remove sump (See Section P).<br />
Remove lubricating oil pump (See Section P\<br />
Remove timing case' Power Take Olf' facing<br />
cover.<br />
Note timing marks (See Section N.l.)<br />
Remove idler gear.<br />
Ir engine is in a swivel stand, turn engine completely<br />
over. Ir not, lar engine over at an angle.<br />
This wilt prevent the tappets dropping out when<br />
the camshart is removed.<br />
Remove camshaft.<br />
To Remove Camshaft Gear.<br />
To remove camshaft gear from camshaft remove<br />
the three sets crews in the centre of the gear.<br />
The gear can now be removed from the camshaft.<br />
To Replace Camsbaft Gear.<br />
Tbe three clearance holes drilled at equaI angies<br />
are the holes for attaching the gear to the camshaft.<br />
Tbc three slotted holes are for use with the fuel<br />
pump.<br />
When fitting areplacement gear to the camshaft,<br />
turn the camshaft untiI No. I cam is upright. It<br />
will be observed that a tapped hole on the camshaft<br />
hub is also at the top, in line with No. I cam.<br />
Look at the gear and it will be noticed that one of<br />
the holes in the gear has the letter .. D " adjacent<br />
to it.<br />
Placc the gear on the hub with these two holes<br />
in line<br />
To Replace Camshaft.<br />
See tbat tappets are in position.<br />
Replace camsbaft.<br />
Replace idler gear but do not lock idler gear<br />
retaining setscrew.<br />
Reset timing (See Section N).<br />
Re-assemble engine as required and to tbe<br />
instructions given for tbc various operations.<br />
To Remove Foei Pump.<br />
Remove fuel injection pipe lines from atomisers<br />
and fuel pump.<br />
Disconnect fuel supply lines.<br />
Remove tbe setscrews holding tbe fuel pump<br />
to tbe timing case and remove fuel pump.<br />
To remove tbe fuel pump gear remove tbe three<br />
setscrews securing tbe gear to tbe fuel pump<br />
adaptor.<br />
To Replace Foei Pump.<br />
Ir the gear bas been removed from tbe fuel pump<br />
re-fit gear or, if necessary, fit replacement gear.<br />
The three slotted holes in tbe gear are for fitting<br />
the gear to the fuel pump adaptor.<br />
Fit fueI pump to timing case.<br />
Time fueI pump in conjunction witb the engine<br />
as given in Section N.<br />
Replace atomisers.<br />
Connect-up fueI supply lines.<br />
Replace fueI injection pipes.<br />
When fitting a new or replacement fuel pump,<br />
remove the pump inspection cover and pour sufficient<br />
engine oil into the spring chamber untiI oil<br />
comes out of the overflow. Refit the inspection<br />
cover.


