iPhone User Guide - Support - Apple
iPhone User Guide - Support - Apple
iPhone User Guide - Support - Apple

You also want an ePaper? Increase the reach of your titles
YUMPU automatically turns print PDFs into web optimized ePapers that Google loves.
You can also restore from an iCloud or iTunes backup during setup.<br />
Note: If you turn on Find My <strong>iPhone</strong> during setup, Activation Lock will be turned on in order to<br />
help deter theft. See Find My <strong>iPhone</strong> on page 38.<br />
Some carriers let you unlock <strong>iPhone</strong> for use with their network. To see if your carrier offers this<br />
option, see support.apple.com/kb/HT1937. Contact your carrier for authorization and setup<br />
information. You need to connect <strong>iPhone</strong> to iTunes to complete the process. Additional fees may<br />
apply. For more information, see support.apple.com/kb/HT5014.<br />
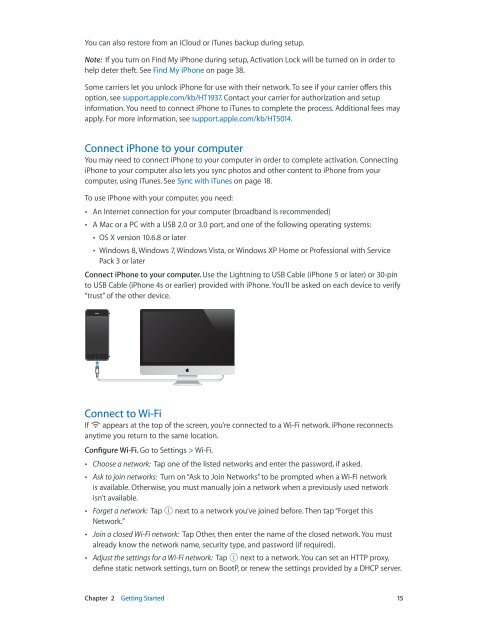
Connect <strong>iPhone</strong> to your computer<br />
You may need to connect <strong>iPhone</strong> to your computer in order to complete activation. Connecting<br />
<strong>iPhone</strong> to your computer also lets you sync photos and other content to <strong>iPhone</strong> from your<br />
computer, using iTunes. See Sync with iTunes on page 18.<br />
To use <strong>iPhone</strong> with your computer, you need:<br />
••<br />
An Internet connection for your computer (broadband is recommended)<br />
••<br />
A Mac or a PC with a USB 2.0 or 3.0 port, and one of the following operating systems:<br />
••<br />
OS X version 10.6.8 or later<br />
••<br />
Windows 8, Windows 7, Windows Vista, or Windows XP Home or Professional with Service<br />
Pack 3 or later<br />
Connect <strong>iPhone</strong> to your computer. Use the Lightning to USB Cable (<strong>iPhone</strong> 5 or later) or 30-pin<br />
to USB Cable (<strong>iPhone</strong> 4s or earlier) provided with <strong>iPhone</strong>. You’ll be asked on each device to verify<br />
“trust” of the other device.<br />
Connect to Wi-Fi<br />
If appears at the top of the screen, you’re connected to a Wi-Fi network. <strong>iPhone</strong> reconnects<br />
anytime you return to the same location.<br />
Configure Wi-Fi. Go to Settings > Wi-Fi.<br />
••<br />
Choose a network: Tap one of the listed networks and enter the password, if asked.<br />
••<br />
Ask to join networks: Turn on “Ask to Join Networks” to be prompted when a Wi-Fi network<br />
is available. Otherwise, you must manually join a network when a previously used network<br />
isn’t available.<br />
••<br />
Forget a network: Tap next to a network you’ve joined before. Then tap “Forget this<br />
Network.”<br />
••<br />
Join a closed Wi-Fi network: Tap Other, then enter the name of the closed network. You must<br />
already know the network name, security type, and password (if required).<br />
••<br />
Adjust the settings for a Wi-Fi network: Tap next to a network. You can set an HTTP proxy,<br />
define static network settings, turn on BootP, or renew the settings provided by a DHCP server.<br />
Chapter 2 Getting Started 15