Evolution Technical Manual - Jemphrey
Evolution Technical Manual - Jemphrey
Evolution Technical Manual - Jemphrey

You also want an ePaper? Increase the reach of your titles
YUMPU automatically turns print PDFs into web optimized ePapers that Google loves.
<strong>Technical</strong> <strong>Manual</strong><br />
17. Referring to Sections 3 & 4 of this manual, Programming Mode and Engineers<br />
Program, use the menu selections available to programme the required settings<br />
for correct machine operation e.g. drink prices, disable selections, time and date<br />
etc.<br />
18. If fitted, check that the coin mechanism and cash box<br />
operate correctly. Release the catch securing the coin<br />
mechanism cover (photo) and swing the cover away from<br />
the door. Fill the coin tubes with correct coinage. Ensure<br />
coin return mechanism functions correctly.<br />
19. Operate the machine through its complete range of selections to ensure that each<br />
vend is correctly dispensed. Follow the instructions detailed on page 64 for making<br />
a vend using the Test Vend switch (6) located on the Service Keypad.<br />
20. Remove the safety key and close the cabinet door. Ensure that the machine is left<br />
in a clean and safe condition.<br />
2.5 Setting Up The Carbonator Unit - Where Fitted<br />
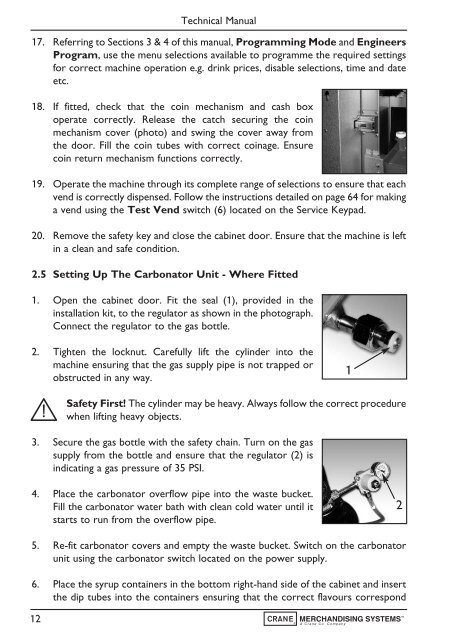
1. Open the cabinet door. Fit the seal (1), provided in the<br />
installation kit, to the regulator as shown in the photograph.<br />
Connect the regulator to the gas bottle.<br />
2. Tighten the locknut. Carefully lift the cylinder into the<br />
machine ensuring that the gas supply pipe is not trapped or<br />
obstructed in any way.<br />
1<br />
Safety First! The cylinder may be heavy. Always follow the correct procedure<br />
when lifting heavy objects.<br />
3. Secure the gas bottle with the safety chain. Turn on the gas<br />
supply from the bottle and ensure that the regulator (2) is<br />
indicating a gas pressure of 35 PSI.<br />
4. Place the carbonator overflow pipe into the waste bucket.<br />
Fill the carbonator water bath with clean cold water until it<br />
starts to run from the overflow pipe.<br />
2<br />
5. Re-fit carbonator covers and empty the waste bucket. Switch on the carbonator<br />
unit using the carbonator switch located on the power supply.<br />
6. Place the syrup containers in the bottom right-hand side of the cabinet and insert<br />
the dip tubes into the containers ensuring that the correct flavours correspond<br />
12