GA-EX58-UD3R - Hardware
GA-EX58-UD3R - Hardware
GA-EX58-UD3R - Hardware

You also want an ePaper? Increase the reach of your titles
YUMPU automatically turns print PDFs into web optimized ePapers that Google loves.
GI<strong>GA</strong>BYTE SATA2 SATA controller:<br />
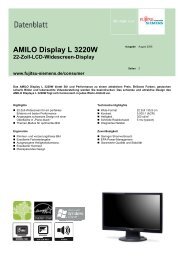
Step 1:<br />
Restart your system to boot from the Windows Vista setup disk and perform standard OS installation<br />
steps. When a screen similar to that below appears (RAID/AHCI hard drive(s) will not be detected at this<br />
stage), select Load Driver (Figure 8).<br />
Figure 8<br />
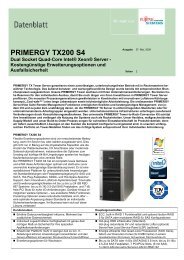
Step 2:<br />
Insert the motherboard driver disk (Method A) or the floppy disk/USB flash drive that contains the SATA<br />
RAID/AHCI driver (Method B), then specify the location of the driver (Figure 9). Note: For users using<br />
a SATA optical drive, be sure to copy the driver files from the motherboard driver disk to a USB flash<br />
drive before installing Windows Vista (go to the BootDrv folder and save the whole GSATA foler to the<br />
USB flash drive). Then use Method B to load the driver.<br />
Method A:<br />
Insert the motherboard driver disk into your system and browse to the following directory:<br />
\BootDrv\GSATA\32Bit<br />
For Windows Vista 64-bit, browse to the 64Bit folder.<br />
Method B:<br />
Insert the USB flash drive containing the driver files and browse to \GSATA\32Bit (for Windows Vista<br />
32-bit) or \GSATA\64Bit (for Windows Vista 64-bit).<br />
Figure 9<br />
<strong>GA</strong>-<strong>EX58</strong>-<strong>UD3R</strong> Motherboard - 94 -