Girard Systems- Warranty and Freight Procedures
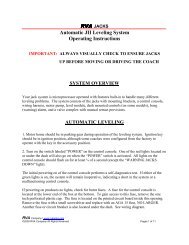
Girard Systems- Warranty and Freight Procedures
Girard Systems- Warranty and Freight Procedures

You also want an ePaper? Increase the reach of your titles
YUMPU automatically turns print PDFs into web optimized ePapers that Google loves.
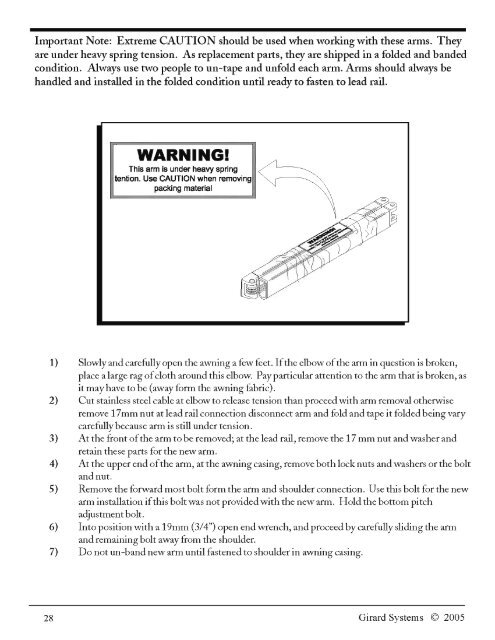
Important Note: Extreme CAUTION should be used when working with these arms. They<br />
are under heavy spring tension. As replacement parts, they are shipped in a folded <strong>and</strong> b<strong>and</strong>ed<br />
condition. Always use two people to un-tape <strong>and</strong> unfold each arm. Arms should always be<br />
h<strong>and</strong>led <strong>and</strong> installed in the folded condition until ready to fasten to lead rail.<br />
WARNING!<br />
This arm is under heavy spring<br />
tention. Use CAUTION when removing<br />
packing material<br />
1) Slowly <strong>and</strong> carefully open the awning a few feet. Ifthe elbow ofthe arm in question is broken,<br />
place a large rag ofcloth around this elbow. Pay particular attention to the arm that is broken, as<br />
it may have to be (away form the awning fabric).<br />
2) Cut stainless steel cable at elbow to release tension than proceedwith arm removal otherwise<br />
remove 17mm nut at lead rail connection disconnect arm <strong>and</strong> fold <strong>and</strong>tape it folded being vary<br />
carefully because arm is still under tension.<br />
3) At the front ofthe arm to be removed; at the lead rail, remove the 17 mm nut <strong>and</strong> washer <strong>and</strong><br />
retain these parts for the new arm.<br />
4) Atthe upper end ofthe arm, atthe awning casing, remove both locknuts <strong>and</strong> washers or the bolt<br />
<strong>and</strong> nut.<br />
5) Remove the forward most bolt form the arm <strong>and</strong> shoulder connection. Use this bolt for the new<br />
arm installation ifthis bolt was not providedwith the new arm. Holdthe bottom pitch<br />
adjustment bolt.<br />
6) Into position with a 19mm (3/4") open endwrench, <strong>and</strong> proceed by carefully sliding the arm<br />
<strong>and</strong> remaining bolt away from the shoulder.<br />
7) Do not un-b<strong>and</strong> new arm until fastened to shoulder in awning casing.<br />
28 <strong>Girard</strong> <strong>Systems</strong> © 2005