Girard Systems- Warranty and Freight Procedures
Girard Systems- Warranty and Freight Procedures
Girard Systems- Warranty and Freight Procedures
You also want an ePaper? Increase the reach of your titles
YUMPU automatically turns print PDFs into web optimized ePapers that Google loves.
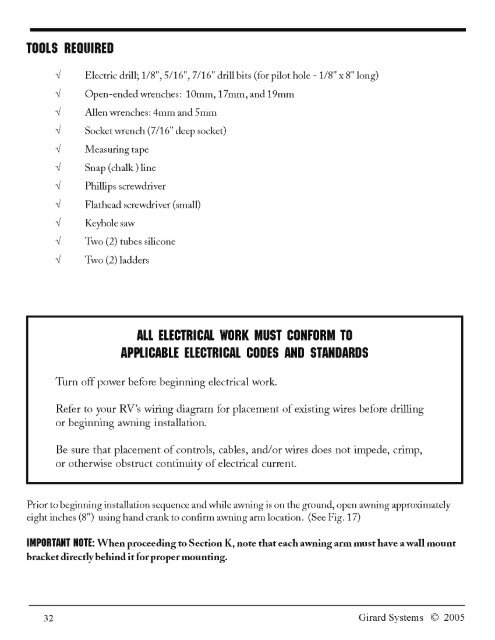
TOOLS REOUIRED<br />
--J<br />
--J<br />
--J<br />
--J<br />
--J<br />
--J<br />
--J<br />
--J<br />
--J<br />
--J<br />
--J<br />
Electric drill; 1/8",5/16",7/16" drill bits (for pilot hole -1/8" x 8" long)<br />
Open-endedwrenches: 10mm, 17mm, <strong>and</strong> 19mm<br />
Allen wrenches: 4mm <strong>and</strong> 5mm<br />
Socket wrench (7/16" deep socket)<br />
Measuring tape<br />
Snap (chalk) line<br />
Phillips screwdriver<br />
Flathead screwdriver (small)<br />
Keyhole saw<br />
Two (2) tubes silicone<br />
Two (2) ladders<br />
ALL ELECTRICAL WORK MUST CONFORM TO<br />
APPLICABLE ELECTRICAL CODES AND STANDARDS<br />
Turn off power before beginning electrical work.<br />
Refer to your RV's wiring diagram for placement ofexisting wires before drilling<br />
or beginning awning installation.<br />
Be sure that placement ofcontrols, cables, <strong>and</strong>/or wires does not impede, crimp,<br />
or otherwise obstruct continuity ofelectrical current.<br />
Prior to beginning installation sequence <strong>and</strong>while awning is on the ground, open awning approximately<br />
eight inches (8") using h<strong>and</strong> crank to confirm awning arm location. (See Fig. 17)<br />
IMPORTANT NOTE: When proceeding to Section K, note that each awning arm must have awall mount<br />
bracket directly behind itfor proper mounting.<br />
32 <strong>Girard</strong> <strong>Systems</strong> © 2005


