You also want an ePaper? Increase the reach of your titles
YUMPU automatically turns print PDFs into web optimized ePapers that Google loves.
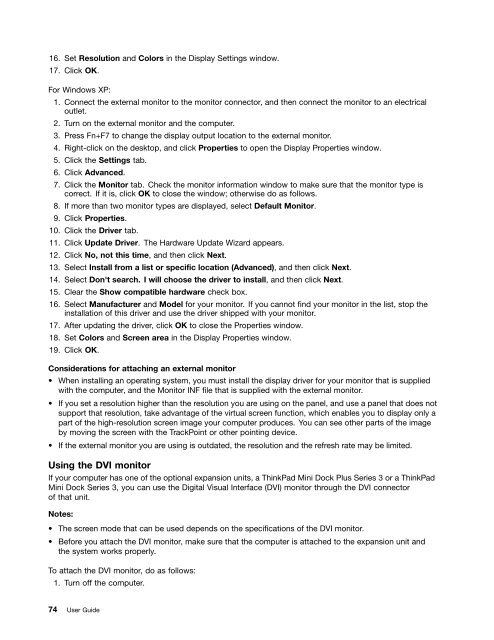
16. Set Resolution and Colors in the Display Settings window.<br />
17. Click OK.<br />
For Windows XP:<br />
1. Connect the external monitor to the monitor connector, and then connect the monitor to an electrical<br />
outlet.<br />
2. Turn on the external monitor and the computer.<br />
3. Press Fn+F7 to change the display output location to the external monitor.<br />
4. Right-click on the desktop, and click Properties to open the Display Properties window.<br />
5. Click the Settings tab.<br />
6. Click Advanced.<br />
7. Click the Monitor tab. Check the monitor information window to make sure that the monitor type is<br />
correct. If it is, click OK to close the window; otherwise do as follows.<br />
8. If more than two monitor types are displayed, select Default Monitor.<br />
9. Click Properties.<br />
10. Click the Driver tab.<br />
11. Click Update Driver. The Hardware Update Wizard appears.<br />
12. Click No, not this time, and then click Next.<br />
13. Select Install from a list or specific location (Advanced), and then click Next.<br />
14. Select Don't search. I will choose the driver to install, and then click Next.<br />
15. Clear the Show compatible hardware check box.<br />
16. Select Manufacturer and Model for your monitor. If you cannot find your monitor in the list, stop the<br />
installation of this driver and use the driver shipped with your monitor.<br />
17. After updating the driver, click OK to close the Properties window.<br />
18. Set Colors and Screen area in the Display Properties window.<br />
19. Click OK.<br />
Considerations for attaching an external monitor<br />
• When installing an operating system, you must install the display driver for your monitor that is supplied<br />
with the computer, and the Monitor INF file that is supplied with the external monitor.<br />
• If you set a resolution higher than the resolution you are using on the panel, and use a panel that does not<br />
support that resolution, take advantage of the virtual screen function, which enables you to display only a<br />
part of the high-resolution screen image your computer produces. You can see other parts of the image<br />
by moving the screen with the TrackPoint or other pointing device.<br />
• If the external monitor you are using is outdated, the resolution and the refresh rate may be limited.<br />
Using the DVI monitor<br />
If your computer has one of the optional expansion units, a ThinkPad Mini Dock Plus Series 3 or a ThinkPad<br />
Mini Dock Series 3, you can use the Digital Visual Interface (DVI) monitor through the DVI connector<br />
of that unit.<br />
Notes:<br />
• The screen mode that can be used depends on the specifications of the DVI monitor.<br />
• Before you attach the DVI monitor, make sure that the computer is attached to the expansion unit and<br />
the system works properly.<br />
To attach the DVI monitor, do as follows:<br />
1. Turn off the computer.<br />
74 <strong>User</strong> <strong>Guide</strong>


