Dolby CP750 Digital Cinema Processor Manual - Projectionniste.net
Dolby CP750 Digital Cinema Processor Manual - Projectionniste.net
Dolby CP750 Digital Cinema Processor Manual - Projectionniste.net

Create successful ePaper yourself
Turn your PDF publications into a flip-book with our unique Google optimized e-Paper software.
Aligning the Auditorium<br />
5.1.2 Amplifiers<br />
• Check for distortion.<br />
• Check for gross gain differences among amplifiers. If one amplifier differs in<br />
performance from the others, it should be checked and repaired.<br />
• Check for blown fuses.<br />
• Ensure that there is good air movement through power amplifiers.<br />
• Check any air filters.<br />
5.1.3 Air Conditioning<br />
If air‐conditioning noise is audible in the theatre, arrange for lubrication of the motor and<br />
fan bearings, adjustment of belts and drives, and cleaning of filters to minimize ambient<br />
noise.<br />
5.2 Microphone Placement<br />
Position a microphone multiplexer in the center of the auditorium listening area. Place each<br />
microphone in the reverberant field rather than in an area that receives the most direct<br />
energy from the speakers. In addition, avoid perfect symmetry. Arrange the microphones<br />
so that they do not form a square or rectangle parallel to the sides of the room. Take care<br />
not to place any of the multiplexing microphones on the auditorium center line. Standing<br />
waves and nodes can cause measurement errors.<br />
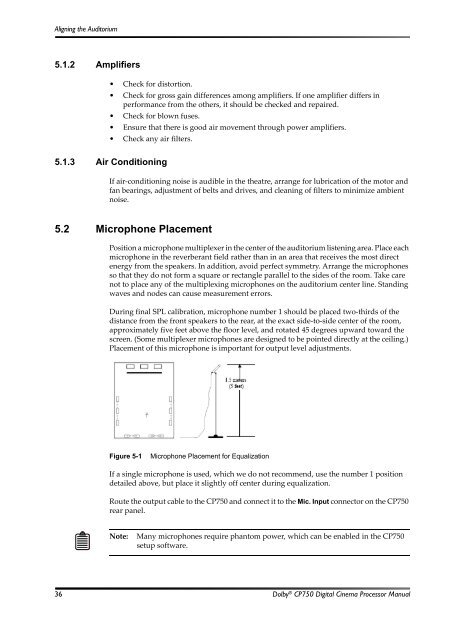
During final SPL calibration, microphone number 1 should be placed two‐thirds of the<br />
distance from the front speakers to the rear, at the exact side‐to‐side center of the room,<br />
approximately five feet above the floor level, and rotated 45 degrees upward toward the<br />
screen. (Some multiplexer microphones are designed to be pointed directly at the ceiling.)<br />
Placement of this microphone is important for output level adjustments.<br />
Figure 5‐1<br />
Figure 5-1<br />
Microphone Placement for Equalization<br />
If a single microphone is used, which we do not recommend, use the number 1 position<br />
detailed above, but place it slightly off center during equalization.<br />
Route the output cable to the <strong>CP750</strong> and connect it to the Mic. Input connector on the <strong>CP750</strong><br />
rear panel.<br />
Note:<br />
Many microphones require phantom power, which can be enabled in the <strong>CP750</strong><br />
setup software.<br />
36 <strong>Dolby</strong> ® <strong>CP750</strong> <strong>Digital</strong> <strong>Cinema</strong> <strong>Processor</strong> <strong>Manual</strong>