Gemini GV6K and Gemini GT6K Programmer's Guide
Gemini GV6K and Gemini GT6K Programmer's Guide
Gemini GV6K and Gemini GT6K Programmer's Guide

Create successful ePaper yourself
Turn your PDF publications into a flip-book with our unique Google optimized e-Paper software.
Running a Stored<br />
Program<br />
<br />
<br />
<br />
<br />
<br />
<br />
or<br />
<br />
<br />
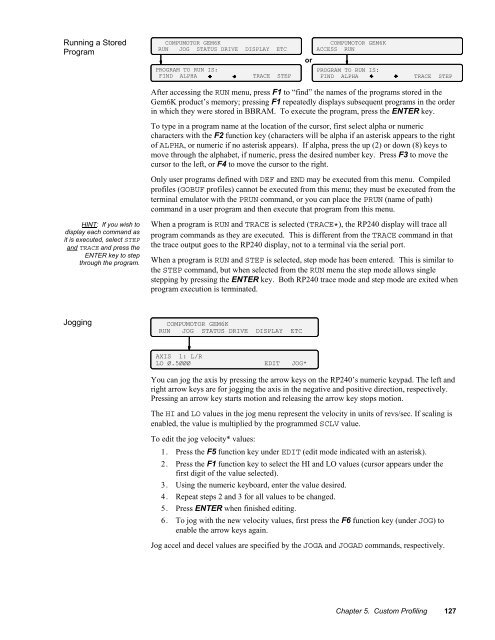
After accessing the RUN menu, press F1 to “find” the names of the programs stored in the<br />
Gem6K product’s memory; pressing F1 repeatedly displays subsequent programs in the order<br />
in which they were stored in BBRAM. To execute the program, press the ENTER key.<br />
To type in a program name at the location of the cursor, first select alpha or numeric<br />
characters with the F2 function key (characters will be alpha if an asterisk appears to the right<br />
of ALPHA, or numeric if no asterisk appears). If alpha, press the up (2) or down (8) keys to<br />
move through the alphabet, if numeric, press the desired number key. Press F3 to move the<br />
cursor to the left, or F4 to move the cursor to the right.<br />
Only user programs defined with DEF <strong>and</strong> END may be executed from this menu. Compiled<br />
profiles (GOBUF profiles) cannot be executed from this menu; they must be executed from the<br />
terminal emulator with the PRUN comm<strong>and</strong>, or you can place the PRUN (name of path)<br />
comm<strong>and</strong> in a user program <strong>and</strong> then execute that program from this menu.<br />
HINT: If you wish to<br />
display each comm<strong>and</strong> as<br />
it is executed, select STEP<br />
<strong>and</strong> TRACE <strong>and</strong> press the<br />
ENTER key to step<br />
through the program.<br />
When a program is RUN <strong>and</strong> TRACE is selected (TRACE*), the RP240 display will trace all<br />
program comm<strong>and</strong>s as they are executed. This is different from the TRACE comm<strong>and</strong> in that<br />
the trace output goes to the RP240 display, not to a terminal via the serial port.<br />
When a program is RUN <strong>and</strong> STEP is selected, step mode has been entered. This is similar to<br />
the STEP comm<strong>and</strong>, but when selected from the RUN menu the step mode allows single<br />
stepping by pressing the ENTER key. Both RP240 trace mode <strong>and</strong> step mode are exited when<br />
program execution is terminated.<br />
Jogging<br />
<br />
<br />
<br />
<br />
You can jog the axis by pressing the arrow keys on the RP240’s numeric keypad. The left <strong>and</strong><br />
right arrow keys are for jogging the axis in the negative <strong>and</strong> positive direction, respectively.<br />
Pressing an arrow key starts motion <strong>and</strong> releasing the arrow key stops motion.<br />
The HI <strong>and</strong> LO values in the jog menu represent the velocity in units of revs/sec. If scaling is<br />
enabled, the value is multiplied by the programmed SCLV value.<br />
To edit the jog velocity* values:<br />
1. Press the F5 function key under EDIT (edit mode indicated with an asterisk).<br />
2. Press the F1 function key to select the HI <strong>and</strong> LO values (cursor appears under the<br />
first digit of the value selected).<br />
3. Using the numeric keyboard, enter the value desired.<br />
4. Repeat steps 2 <strong>and</strong> 3 for all values to be changed.<br />
5. Press ENTER when finished editing.<br />
6. To jog with the new velocity values, first press the F6 function key (under JOG) to<br />
enable the arrow keys again.<br />
Jog accel <strong>and</strong> decel values are specified by the JOGA <strong>and</strong> JOGAD comm<strong>and</strong>s, respectively.<br />
Chapter 5. Custom Profiling 127