Create successful ePaper yourself
Turn your PDF publications into a flip-book with our unique Google optimized e-Paper software.
Step 5 - Enter the MTH Data<br />
The MTH (math) screen tells the ScanGauge the math needed to scale and/or offset the value received<br />
for the X-GAUGE entry screens. When you’re done, press the OK button to proceed to the next step.<br />
Step 6 - Give Your Gauge a Name<br />
The Name Screen allows you to input a 3-letter designator for the name of the gauge you are making.<br />
This screen allows a complete ASCII set of characters to be used. This includes punctuation and<br />
symbols. You can give the gauge any 3-character name. Please note, you can give your new gauge a<br />
name that matches those that are already defined. This should be avoided as it can cause confusion.<br />
When you’re done, press the OK button to proceed to the next step.<br />
Step 7 - Saving Your X-GAUGE<br />
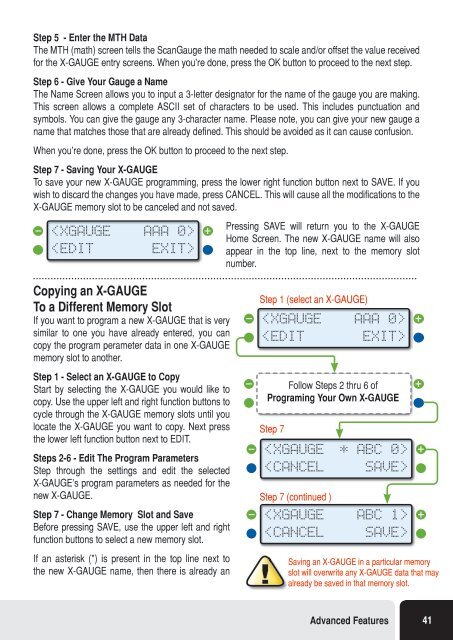
To save your new X-GAUGE programming, press the lower right function button next to SAVE. If you<br />
wish to discard the changes you have made, press CANCEL. This will cause all the modifications to the<br />
X-GAUGE memory slot to be canceled and not saved.<br />
<br />
Pressing SAVE will return you to the X-GAUGE<br />
Home Screen. The new X-GAUGE name will also<br />
appear in the top line, next to the memory slot<br />
number.<br />
Copying an X-GAUGE<br />
To a Different Memory Slot<br />
If you want to program a new X-GAUGE that is very<br />
similar to one you have already entered, you can<br />
copy the program perameter data in one X-GAUGE<br />
memory slot to another.<br />
Step 1 - Select an X-GAUGE to Copy<br />
Start by selecting the X-GAUGE you would like to<br />
copy. Use the upper left and right function buttons to<br />
cycle through the X-GAUGE memory slots until you<br />
locate the X-GAUGE you want to copy. Next press<br />
the lower left function button next to EDIT.<br />
Steps 2-6 - Edit The Program Parameters<br />
Step through the settings and edit the selected<br />
X-GAUGE’s program parameters as needed for the<br />
new X-GAUGE.<br />
Step 7 - Change Memory Slot and Save<br />
Before pressing SAVE, use the upper left and right<br />
function buttons to select a new memory slot.<br />
If an asterisk (*) is present in the top line next to<br />
the new X-GAUGE name, then there is already an<br />
Step 1 (select an X-GAUGE)<br />
<br />
Saving an X-GAUGE in a particular memory<br />
slot will overwrite any X-GAUGE data that may<br />
already be saved in that memory slot.<br />
Advanced Features 41


