
You also want an ePaper? Increase the reach of your titles
YUMPU automatically turns print PDFs into web optimized ePapers that Google loves.
Installation<br />
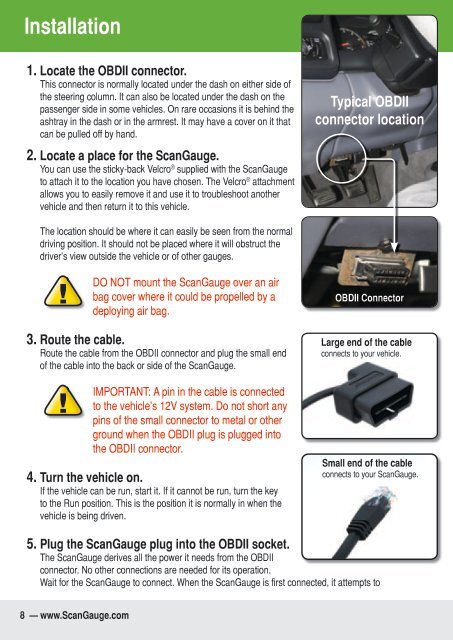
1. Locate the OBDII connector.<br />
This connector is normally located under the dash on either side of<br />
the steering column. It can also be located under the dash on the<br />
passenger side in some vehicles. On rare occasions it is behind the<br />
ashtray in the dash or in the armrest. It may have a cover on it that<br />
can be pulled off by hand.<br />
2. Locate a place for the ScanGauge.<br />
You can use the sticky-back Velcro ® supplied with the ScanGauge<br />
to attach it to the location you have chosen. The Velcro ® attachment<br />
allows you to easily remove it and use it to troubleshoot another Typical OBD II Connector location<br />
vehicle and then return it to this vehicle.<br />
The location should be where it can easily be seen from the normal<br />
driving position. It should not be placed where it will obstruct the<br />
driver’s view outside the vehicle or of other gauges.<br />
Typical OBDII<br />
connector location<br />
DO NOT mount the ScanGauge over an air<br />
bag cover where it could be propelled by a<br />
deploying air bag.<br />
3. Route the cable.<br />
Route the cable from the OBDII connector and plug the small end<br />
of the cable into the back or side of the ScanGauge.<br />
IMPORTANT: A pin in the cable is connected<br />
to the vehicle’s 12V system. Do not short any<br />
pins of the small connector to metal or other<br />
ground when the OBDII plug is plugged into<br />
the OBDII connector.<br />
4. Turn the vehicle on.<br />
If the vehicle can be run, start it. If it cannot be run, turn the key<br />
to the Run position. This is the position it is normally in when the<br />
vehicle is being driven.<br />
OBDII Connector<br />
Large end of the cable<br />
connects to your vehicle.<br />
OBD II Connector<br />
Small end of the cable<br />
connects to your ScanGauge.<br />
5. Plug the ScanGauge plug into the OBDII socket.<br />
The ScanGauge derives all the power it needs from the OBDII<br />
connector. No other connections are needed for its operation.<br />
Wait for the ScanGauge to connect. When the ScanGauge is first connected, it attempts to<br />
8 — www.ScanGauge.com