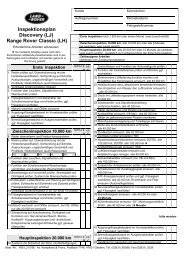
Range Rover Workshop Manual - Eng - Landiesrus
Range Rover Workshop Manual - Eng - Landiesrus
Range Rover Workshop Manual - Eng - Landiesrus

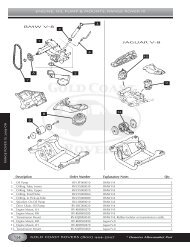
Create successful ePaper yourself
Turn your PDF publications into a flip-book with our unique Google optimized e-Paper software.
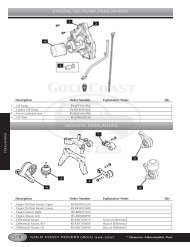
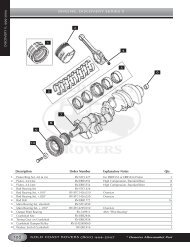
LAND ROVER V8112. Lower lift.113. Connect handbrake cable to lever, secure withclevis pin and clip.<strong>Manual</strong> Vehicles:114. Fit seal around gearbox remote housing totransmission tunnel aperture.115. Position gear lever. Secure with bolts. Tightento 25 Nm (18 lbf.ft)116. Fit gaiter and ring. Secure with bolts.117. Fit centre console. See CHASSIS AND BODY,Repair.118. Connect clutch flexible hose. Remove hoseclamp.119. Secure flexible hose union to gearbox bracketwith clip.120. Bleed clutch hydraulic system. See CLUTCH,Repair.Automatic Vehicles:121. Fit window switch pack. See ELECTRICAL,Repair.All Vehicles:122. With assistance, position radiator/condenser/oilcooler assembly.123. Connect multiplugs to condenser cooling fans.124. <strong>Eng</strong>age radiator in lower mounting rubbers.Secure with nuts and bolts.125. Remove plugs from air conditioning compressorand pipes.126. Fit new ’O’ rings to compressor pipes. Lubricate’O’ rings with compressor oil. Connect tocompressor.127. Fit compressor connection bolts. Tighten to 23Nm (17 lbf.ft)128. Remove plugs from air conditioning condenserand pipes.129. Fit new ’O’ rings to condenser pipes. Lubricate’O’ rings with compressor oil. Secure pipes tocondenser. Tighten to 15 Nm (11 lbf.ft)130. Connect gearbox oil temperature multiplug.131. Remove plugs from power steering pump andpipes.132. Fit new ’O’ rings to power steering pipes.Lubricate ’O’ rings with power steering fluid.Secure to power steering pump. Tighten to 16Nm (12 lbf.ft)133. Untie power steering reservoir from engine.Remove plugs. Connect return pipe. Securereturn pipe to reservoir with clip.134. Position reservoir to radiator. Secure with bolts.135. Secure fog lamp breather hoses to clips oneither side of radiator.136. Route plenum chamber hose along front ofengine. Secure in clips.137. Connect hose to plenum chamber water jacket.Secure with clip.138. Connect coolant hoses to radiator, thermostathousing and inlet manifold. Secure hoses withclips.139. Remove plugs from oil coolers and pipes.140. Lubricate pipes with clean fluid. Fit new ’O’ rings.Connect to oil coolers. Tighten to 30 Nm (22lbf.ft)141. Fit washer bottle filler neck. Secure with bolt andscrew.142. Fit radiator deflector panels. Secure with studs.143. Position bonnet platform. Secure bonnet releasecable to platform with clips.144. Secure bonnet platform with bolts.145. Fit front grille. See CHASSIS AND BODY,Repair.146. Fit cooling fan and viscous coupling. SeeCOOLING SYSTEM, Repair.147. Evacuate and recharge air conditioning system.See AIR CONDITIONING, Adjustment.148. Refill cooling system. See COOLING SYSTEM,Repair.149. Replenish transmission fluids. SeeLUBRICANTS, FLUIDS AND CAPACITIES,Information.150. Replenish engine oil. See LUBRICANTS,FLUIDS AND CAPACITIES, Information.151. Fit oil filler cap.152. Route engine harness along valance. Secureclip.153. Connect engine harness multiplugs to mainharness. Secure earth terminal to valance stud.154. Connect engine harness multiplug to base offuse box.155. Position fuse box. Secure with bolts.156. Position earth lead to alternator bracket. Securewith bolt.157. Fit battery tray. Secure with bolts.158. Fit starter feed wire to battery positive terminalclamp. Secure with nut.159. Position engine harness to battery tray. Secureharness grommets.160. Secure harness clamp to battery tray withscrews.REPAIR15