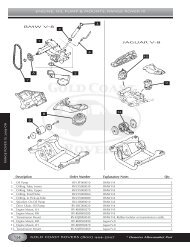
Range Rover Workshop Manual - Eng - Landiesrus
Range Rover Workshop Manual - Eng - Landiesrus
Range Rover Workshop Manual - Eng - Landiesrus

You also want an ePaper? Increase the reach of your titles
YUMPU automatically turns print PDFs into web optimized ePapers that Google loves.
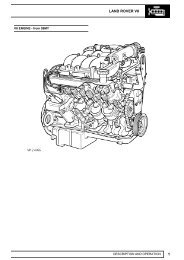
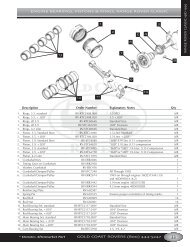
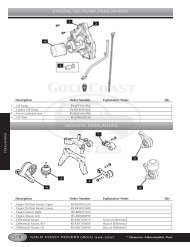
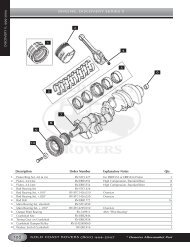
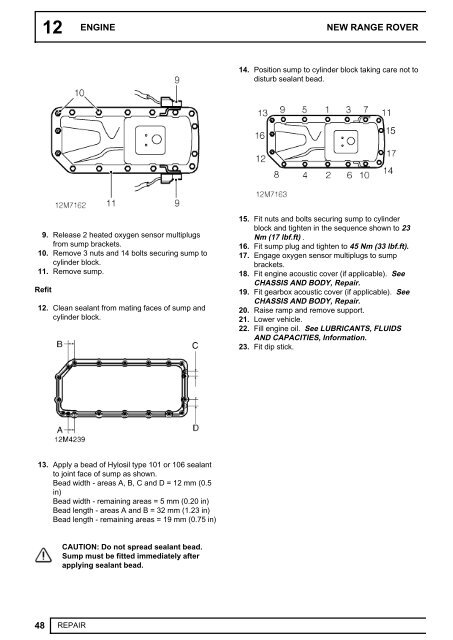
12ENGINE NEW RANGE ROVER14. Position sump to cylinder block taking care not todisturb sealant bead.9. Release 2 heated oxygen sensor multiplugsfrom sump brackets.10. Remove 3 nuts and 14 bolts securing sump tocylinder block.11. Remove sump.Refit12. Clean sealant from mating faces of sump andcylinder block.15. Fit nuts and bolts securing sump to cylinderblock and tighten in the sequence shown to 23Nm (17 lbf.ft) .16. Fit sump plug and tighten to 45 Nm (33 lbf.ft).17. <strong>Eng</strong>age oxygen sensor multiplugs to sumpbrackets.18. Fit engine acoustic cover (if applicable). SeeCHASSIS AND BODY, Repair.19. Fit gearbox acoustic cover (if applicable). SeeCHASSIS AND BODY, Repair.20. Raise ramp and remove support.21. Lower vehicle.22. Fill engine oil. See LUBRICANTS, FLUIDSAND CAPACITIES, Information.23. Fit dip stick.13. Apply a bead of Hylosil type 101 or 106 sealantto joint face of sump as shown.Bead width - areas A, B, C and D = 12 mm (0.5in)Bead width - remaining areas = 5 mm (0.20 in)Bead length - areas A and B = 32 mm (1.23 in)Bead length - remaining areas = 19 mm (0.75 in)CAUTION: Do not spread sealant bead.Sump must be fitted immediately afterapplying sealant bead.48 REPAIR