
You also want an ePaper? Increase the reach of your titles
YUMPU automatically turns print PDFs into web optimized ePapers that Google loves.
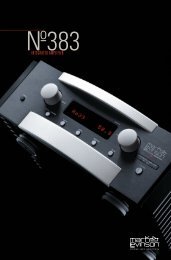
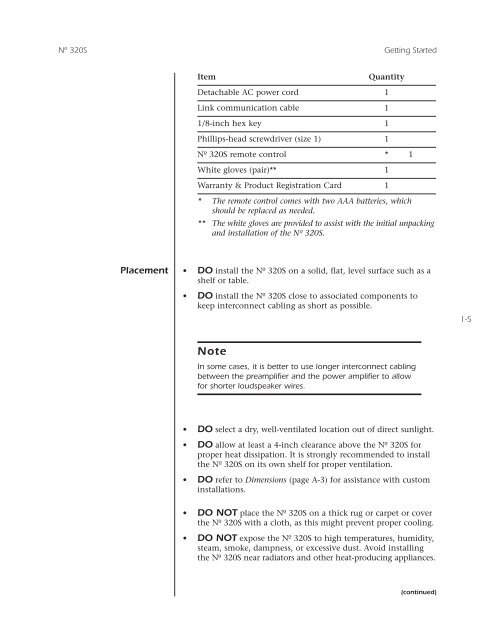
Nº 320S Getting StartedItemQuantityDetachable AC power cord 1Link communication cable 11/8-inch hex key 1Phillips-head screwdriver (size 1) 1Nº 320S remote control * 1White gloves (pair)** 1Warranty & Product Registration Card 1* The remote control comes with two AAA batteries, whichshould be replaced as needed.** The white gloves are provided to assist with the initial unpackingand installation of the Nº 320S.Placement • DO install the Nº 320S on a solid, flat, level surface such as ashelf or table.• DO install the Nº 320S close to associated components tokeep interconnect cabling as short as possible.1-5NoteIn some cases, it is better to use longer interconnect cablingbetween the preamplifier and the power amplifier to allowfor shorter loudspeaker wires.• DO select a dry, well-ventilated location out of direct sunlight.• DO allow at least a 4-inch clearance above the Nº 320S forproper heat dissipation. It is strongly recommended to installthe Nº 320S on its own shelf for proper ventilation.• DO refer to Dimensions (page A-3) for assistance with custominstallations.• DO NOT place the Nº 320S on a thick rug or carpet or coverthe Nº 320S with a cloth, as this might prevent proper cooling.• DO NOT expose the Nº 320S to high temperatures, humidity,steam, smoke, dampness, or excessive dust. Avoid installingthe Nº 320S near radiators and other heat-producing appliances.(continued)