Old School Chopper Frame Fabrication - Knucklebuster
Old School Chopper Frame Fabrication - Knucklebuster
Old School Chopper Frame Fabrication - Knucklebuster

You also want an ePaper? Increase the reach of your titles
YUMPU automatically turns print PDFs into web optimized ePapers that Google loves.
<strong>Old</strong> <strong>School</strong> <strong>Chopper</strong> <strong>Frame</strong> <strong>Fabrication</strong><br />
from http://64.172.168.34/neatstuff/<br />
Part 1<br />
The easiest frame to build is a traditional old school styled chopper since there aren’t any complicated bends or compound<br />
miters to cut so we decided to show the chassis fabrication process from A to Z as we do it. Others probably have different<br />
techniques but this system has worked for us over the past thirty years and guarantees a good straight frame using a minimum<br />
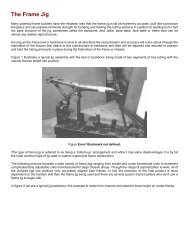
of special tools or really fancy jigs. About half of the frame is constructed without a traditional building jig being used to<br />
begin with so this is a good project to start with if you want to build a traditional frame jig but you don’t have a frame to use<br />
as a mock-up. As work progresses on the chassis you can fabricate a jig one piece at a time when it’s needed.<br />
The frame for this particular project is derived from the stock 1948 Harley hardtail design but we stretched the downtubes<br />
four inches, the backbone two inches and raised the rear axle plates plates one inch and shifted them two inches rearward.<br />
These changes result in a lower than stock frame having a perfectly straight backbone line from the steering neck to the rear<br />
axle when viewed from the side for the classic chopper look.<br />
These instructions are intended to accompany part of the material that we provide with our large-scale building plans. This is<br />
the first time that we have published them separately and while we have tried to modify the diagrams and exhibits to fit into<br />
the size limitations imposed by a web page some of the pictures may be to small to be readable. If you don't have our plans<br />
and you reach a stumbling block on your project please contact us and we'll see if we can help you out.<br />
The frame we're building for this particular project will accept Panhead, Shovel and Evo engines and Knuckleheads and<br />
Flatheads with a front motor mount spacer. It's designed to use a 140 or 150 rear tire with standard chain.<br />
Our goal for this particular project is to have a rolling chassis for under $1500 or about $6000 less than if we bought<br />
one ready-made.<br />
To start with you need thirty feet of 1.25”x.120” ERW tubing. We’d suggest that you buy two full twenty-foot lengths since<br />
this will give you some extra material in case you make a few miscalculated cuts or bends. You’ll also need two feet of<br />
1x2x.120 rectangular steel tube for cross members. To start the project you won’t need a steering neck or axle plates until<br />
further down the line so<br />
you can get this frame<br />
started with very little upfront<br />
cash outlay.<br />
After you’ve secured the<br />
tubing you can cut it into<br />
working lengths using an<br />
abrasive cutoff saw if you<br />
have one otherwise use a<br />
sawsall or even a small<br />
tubing cutter. As a last<br />
resort a regular old<br />
hacksaw will get the job<br />
done but will eat up a good<br />
chunk of time and give you<br />
some nasty blisters.<br />
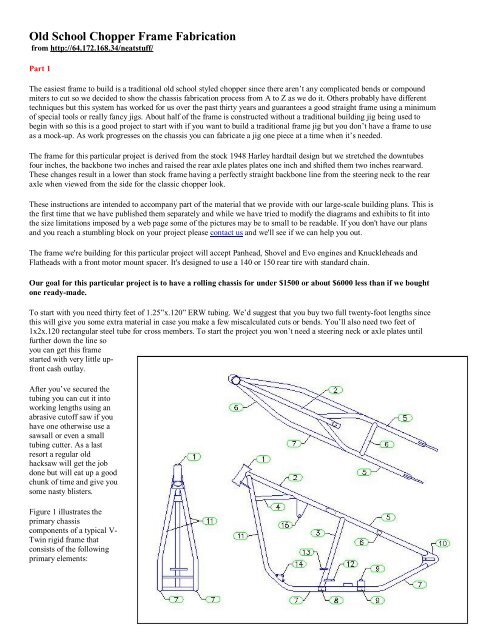
Figure 1 illustrates the<br />
primary chassis<br />
components of a typical V-<br />
Twin rigid frame that<br />
consists of the following<br />
primary elements: