Old School Chopper Frame Fabrication - Knucklebuster
Old School Chopper Frame Fabrication - Knucklebuster
Old School Chopper Frame Fabrication - Knucklebuster
You also want an ePaper? Increase the reach of your titles
YUMPU automatically turns print PDFs into web optimized ePapers that Google loves.
an eighth of an inch clearance between components and frame members. An alternative would have been to make the frame a<br />
sixteenth of an inch narrower but in this case since there was only one point of potential interference it made more sense to<br />
just get out the grinder as the cast bolt boss was very thick.<br />
Before we get back on track and start on the down tube notches it may be important to reemphasize the importance of<br />
building a welding jig one piece at a time while we're also building our first frame. A good frame can be built without using a<br />
conventional welding jig and all types of temporary jigs and fixtures can be made using wood, clamps, spacers and cribbing<br />
but it is far easier to just go ahead and build even a rudimentary jig out of two by fours than it is to rely on stop-gap<br />
temporary lash-ups that have to be disassembled and reassembled as you progress through the fabrication process. A jig, even<br />
a crude one, is your third hand and believe me there will be times when you wished that you hand four hands when you're<br />
trying to hold together three parts at one time and getting some good accurate tack welds into place without everything<br />
moving around.<br />
To make the notches where the down tubes intersect the backbone (top tube) it's best to create some arrangement of<br />
temporary fixtures or use a jig to hold the backbone in its correct attitude as it would set on a finished frame. on our particular<br />
build the top tube slopes down towards the rear axle adjusters twenty four degrees from true horizontal. The height is<br />
determined by the length of the seat post, the slant angle of the seat post and the width of the lower rails. If you've welded up<br />
the upper frame section with the seat post and seat post cross member you can simply set this assembly in place and hold it at<br />
the proper angle.<br />
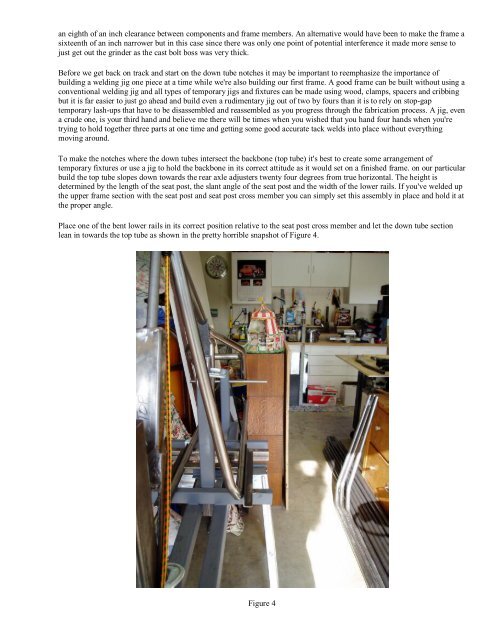
Place one of the bent lower rails in its correct position relative to the seat post cross member and let the down tube section<br />
lean in towards the top tube as shown in the pretty horrible snapshot of Figure 4.<br />
Figure 4


