Old School Chopper Frame Fabrication - Knucklebuster
Old School Chopper Frame Fabrication - Knucklebuster
Old School Chopper Frame Fabrication - Knucklebuster

Create successful ePaper yourself
Turn your PDF publications into a flip-book with our unique Google optimized e-Paper software.
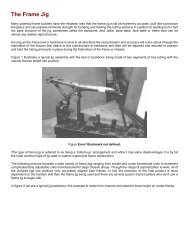
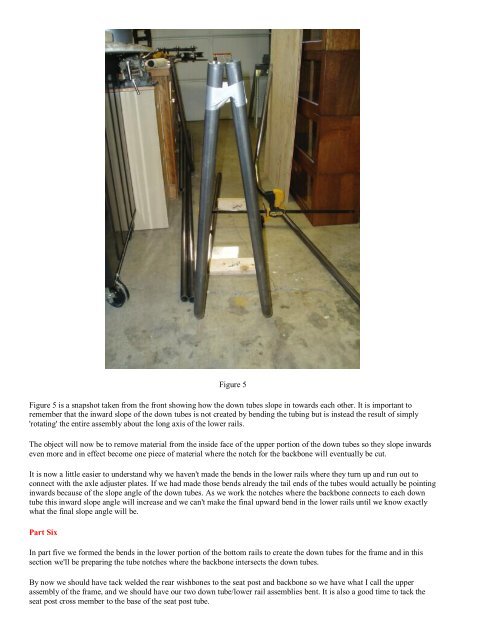
Figure 5<br />
Figure 5 is a snapshot taken from the front showing how the down tubes slope in towards each other. It is important to<br />
remember that the inward slope of the down tubes is not created by bending the tubing but is instead the result of simply<br />
'rotating' the entire assembly about the long axis of the lower rails.<br />
The object will now be to remove material from the inside face of the upper portion of the down tubes so they slope inwards<br />
even more and in effect become one piece of material where the notch for the backbone will eventually be cut.<br />
It is now a little easier to understand why we haven't made the bends in the lower rails where they turn up and run out to<br />
connect with the axle adjuster plates. If we had made those bends already the tail ends of the tubes would actually be pointing<br />
inwards because of the slope angle of the down tubes. As we work the notches where the backbone connects to each down<br />
tube this inward slope angle will increase and we can't make the final upward bend in the lower rails until we know exactly<br />
what the final slope angle will be.<br />
Part Six<br />
In part five we formed the bends in the lower portion of the bottom rails to create the down tubes for the frame and in this<br />
section we'll be preparing the tube notches where the backbone intersects the down tubes.<br />
By now we should have tack welded the rear wishbones to the seat post and backbone so we have what I call the upper<br />
assembly of the frame, and we should have our two down tube/lower rail assemblies bent. It is also a good time to tack the<br />
seat post cross member to the base of the seat post tube.