Old School Chopper Frame Fabrication - Knucklebuster
Old School Chopper Frame Fabrication - Knucklebuster
Old School Chopper Frame Fabrication - Knucklebuster

You also want an ePaper? Increase the reach of your titles
YUMPU automatically turns print PDFs into web optimized ePapers that Google loves.
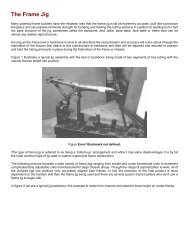
Figure 2<br />
Clean the notch up slightly and make a trial fit of the neck piece and check the rake with an angle finder. To decrease the rake<br />
grind away on the lower edge of the notch and to increase the rake grind away on the upper portion of the notch.<br />
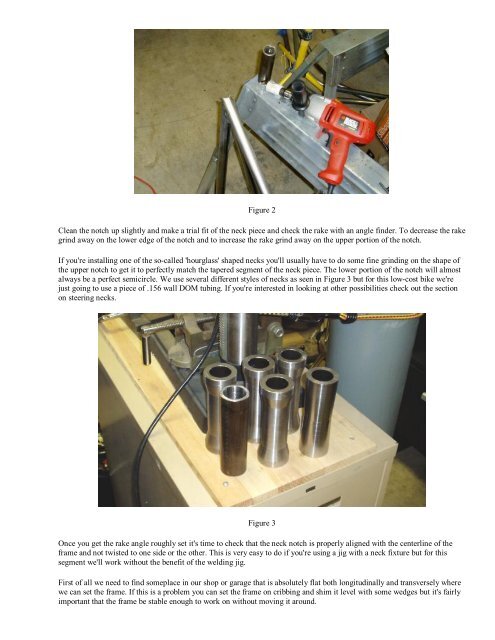
If you're installing one of the so-called 'hourglass' shaped necks you'll usually have to do some fine grinding on the shape of<br />
the upper notch to get it to perfectly match the tapered segment of the neck piece. The lower portion of the notch will almost<br />
always be a perfect semicircle. We use several different styles of necks as seen in Figure 3 but for this low-cost bike we're<br />
just going to use a piece of .156 wall DOM tubing. If you're interested in looking at other possibilities check out the section<br />
on steering necks.<br />
Figure 3<br />
Once you get the rake angle roughly set it's time to check that the neck notch is properly aligned with the centerline of the<br />
frame and not twisted to one side or the other. This is very easy to do if you're using a jig with a neck fixture but for this<br />
segment we'll work without the benefit of the welding jig.<br />
First of all we need to find someplace in our shop or garage that is absolutely flat both longitudinally and transversely where<br />
we can set the frame. If this is a problem you can set the frame on cribbing and shim it level with some wedges but it's fairly<br />
important that the frame be stable enough to work on without moving it around.