Old School Chopper Frame Fabrication - Knucklebuster
Old School Chopper Frame Fabrication - Knucklebuster
Old School Chopper Frame Fabrication - Knucklebuster

You also want an ePaper? Increase the reach of your titles
YUMPU automatically turns print PDFs into web optimized ePapers that Google loves.
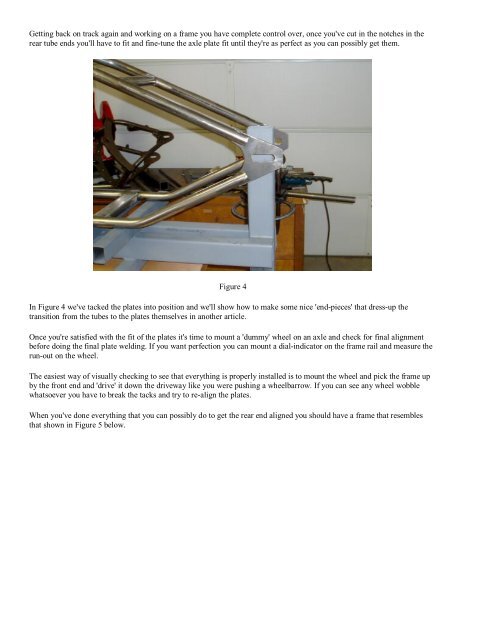
Getting back on track again and working on a frame you have complete control over, once you've cut in the notches in the<br />
rear tube ends you'll have to fit and fine-tune the axle plate fit until they're as perfect as you can possibly get them.<br />
Figure 4<br />
In Figure 4 we've tacked the plates into position and we'll show how to make some nice 'end-pieces' that dress-up the<br />
transition from the tubes to the plates themselves in another article.<br />
Once you're satisfied with the fit of the plates it's time to mount a 'dummy' wheel on an axle and check for final alignment<br />
before doing the final plate welding. If you want perfection you can mount a dial-indicator on the frame rail and measure the<br />
run-out on the wheel.<br />
The easiest way of visually checking to see that everything is properly installed is to mount the wheel and pick the frame up<br />
by the front end and 'drive' it down the driveway like you were pushing a wheelbarrow. If you can see any wheel wobble<br />
whatsoever you have to break the tacks and try to re-align the plates.<br />
When you've done everything that you can possibly do to get the rear end aligned you should have a frame that resembles<br />
that shown in Figure 5 below.