Original Instruction Manual Instructions d'emploi d'origine ... - Makita
Original Instruction Manual Instructions d'emploi d'origine ... - Makita
Original Instruction Manual Instructions d'emploi d'origine ... - Makita

You also want an ePaper? Increase the reach of your titles
YUMPU automatically turns print PDFs into web optimized ePapers that Google loves.
SERVICING INSTRUCTIONS<br />
CAUTION: Before doing any work on the Petrol Brushcutter, always stop the engine and pull the plug cap off the spark plug (see “checking the<br />
spark plug”).<br />
Always wear protective gloves!<br />
To ensure a long service life and to avoid any damage to the equipment, the following servicing operations should be performed at regular<br />
intervals.<br />
Daily checkup and maintenance<br />
– Before operation, check the machine for loose screws or missing parts. Pay particular attention to the tightness of the cutter blade or nylon<br />
cutting head.<br />
– Before operation, always check for clogging of the cooling air passage and the cylinder fins.<br />
Clean them if necessary.<br />
– Perform the following work daily after use:<br />
• Clean the Petrol Brushcutter externally and inspect for damage.<br />
• Clean the air filter. When working under extremely dusty conditions, clean the filter the severall times a day.<br />
• Check the blade or the nylon cutting head for damage and make sure it is firmly mounted.<br />
• Check that there is sufficient difference between idling and engagement speed to ensure that the cutting tool is at a standstill while the<br />
engine is idling (if necessary reduce idling speed).<br />
If under idling conditions the tool should still continue to run, consult your nearest Authorized Service Agent.<br />
– Check the functioning of the I-O switch, the lock-off lever, the control lever, and the look button.<br />
REPLACEMENT OF ENGINE OIL<br />
Deteriorated engine oil will shorten the life of the sliding and rotating parts to a great extent. Be sure to check the period and quantity of<br />
replacement.<br />
ATTENTION: In general, the engine main unit and engine oil still remain hot just after the engine is stopped. In replacement of oil,<br />
confirm that the engine main unit and engine oil are sufficiently cooled down. Otherwise, there may remain a risk of<br />
scald.<br />
Note: If the oil filled above the limit, it may be contaminated or may catch fire with white smoke.<br />
Interval of replacement: Initially, every 20 operating hours, and subsequently every 50 operating hours<br />
Recommended oil: SAE10W-30 oil of API Classification SF Class or higher (4-stroke engine oil for automobile)<br />
In replacement, perform the following procedure.<br />
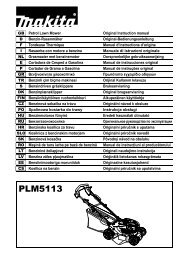
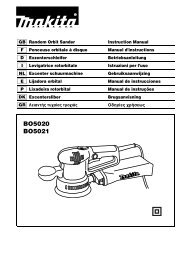
1) Confirm that the fuel tank cap is tightened securely.<br />
2) Place large container (pan, etc.) under drain hole.<br />
3) Remove drain bolt and then remove oil cap to drain out oil from drain hole.<br />
At this time, be sure not to mislay drain bolt’s gasket, or to dirty any of the<br />
removed components.<br />
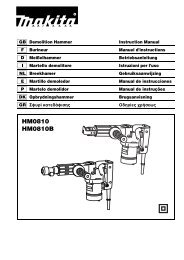
4) Once all the oil has been drained, combine gasket and drain bolt, and tightly<br />
secure drain bolt, so that it will not loosen and cause leaks.<br />
* Use cloth to fully wipe off any oil attached to bolt and equipment.<br />
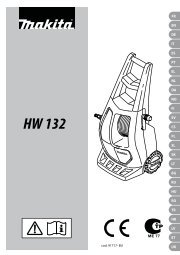
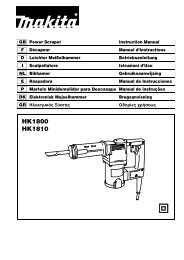
Alternative draining method<br />
Remove oil cap, tilt Petrol Brushcutter toward oil filler hole, and drain out oil.<br />
Collect oil in container.<br />
19<br />
Fuel tank cap<br />
Oil cap<br />
Oil cap<br />
Drain hole<br />
Gasket<br />
Drain bolt