

Samsung VP-MX10H (VP-MX10H/XEF ) - Manuel de l'utilisateur 5.52 MB, pdf, Anglais, ALLEMAND
Samsung VP-MX10H (VP-MX10H/XEF ) - Manuel de l'utilisateur 5.52 MB, pdf, Anglais, ALLEMAND
Samsung VP-MX10H (VP-MX10H/XEF ) - Manuel de l'utilisateur 5.52 MB, pdf, Anglais, ALLEMAND

You also want an ePaper? Increase the reach of your titles
YUMPU automatically turns print PDFs into web optimized ePapers that Google loves.
INSTALLING THE SOFTWARE<br />
Installing DV Media Pro Programme<br />
Before you start!<br />
• Turn on your PC. Exit all other applications running.<br />
• nsert the provi<strong>de</strong>d CD into the CD-OM drive.<br />
- The setup screen appears automatically soon after the CD was inserted.<br />
f the setup screen does not appear, click on “Start" on the bottom left corner<br />
and select “un” to display a dialog. Type “D:\autorun.exe” and then press<br />
ENTE, if your CD-OM drive is mapped to “D:Drive”.<br />
Installing Driver - DV Driver and DirectX 9.0<br />
• DV Driver is a software driver that is required to support establishing<br />
connection to a PC.(f it is not installed, some functions will not be supported.)<br />
71_English<br />
You need to install DV Media Pro to play back recor<strong>de</strong>d<br />
movie files or the transferred data from memory camcor<strong>de</strong>r<br />
with the USB cable on your PC. When you install the DV<br />
Media Pro software on your Windows computer, you can<br />
enjoy the following operations by connecting your memory<br />
camcor<strong>de</strong>r to your computer via a USB cable.<br />
- View movie recordings on PC:<br />
DV Driver - DirectX9.0 - Vi<strong>de</strong>o Co<strong>de</strong>c<br />
- PC camera/USB streaming function:<br />
DV Driver - DirectX9.0 - Vi<strong>de</strong>o Co<strong>de</strong>c<br />
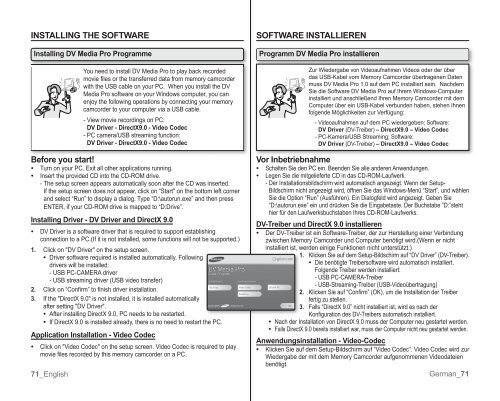
1. Click on "DV Driver" on the setup screen.<br />
• Driver software required is installed automatically. Following<br />
drivers will be installed:<br />
- USB PC-CAMEA driver<br />
- USB streaming driver (USB vi<strong>de</strong>o transfer)<br />
2. Click on “Confirm” to finish driver installation.<br />
3. f the "DirectX 9.0" is not installed, it is installed automatically<br />
after setting "DV Driver".<br />
• After installing DirectX 9.0, PC needs to be restarted.<br />
• f DirectX 9.0 is installed already, there is no need to restart the PC.<br />
Application Installation - Vi<strong>de</strong>o Co<strong>de</strong>c<br />
• Click on "Vi<strong>de</strong>o Co<strong>de</strong>c" on the setup screen. Vi<strong>de</strong>o Co<strong>de</strong>c is required to play<br />
movie files recor<strong>de</strong>d by this memory camcor<strong>de</strong>r on a PC.<br />
SOFTWARE INSTALLIEREN<br />
Programm DV Media Pro installieren<br />
Vor Inbetriebnahme<br />
• Schalten Sie <strong>de</strong>n PC ein. Been<strong>de</strong>n Sie alle an<strong>de</strong>ren Anwendungen.<br />
• Legen Sie die mitgelieferte CD in das CD-OM-Laufwerk.<br />
- Der nstallationsbildschirm wird automatisch angezeigt. Wenn <strong>de</strong>r Setup-<br />
Bildschirm nicht angezeigt wird, öffnen Sie das Windows-Menü “Start”, und whlen<br />
Sie die Option “un” (Ausführen). Ein Dialogfeld wird angezeigt. eben Sie<br />
“D:\autorun.exe” ein und drücken Sie die Eingabetaste. Der Buchstabe “D:”steht<br />
hier für <strong>de</strong>n Laufwerksbuchstaben hres CD-OM-Laufwerks.<br />
DV-Treiber und DirectX 9.0 installieren<br />
• Der DV-Treiber ist ein Software-Treiber, <strong>de</strong>r zur Herstellung einer Verbindung<br />
zwischen Memory Camcor<strong>de</strong>r und Computer benötigt wird.(Wenn er nicht<br />
installiert ist, wer<strong>de</strong>n einige Funktionen nicht unterstützt.)<br />
1. Klicken Sie auf <strong>de</strong>m Setup-Bildschirm auf “DV Driver” (DV-Treiber).<br />
• Die benötigte Treibersoftware wird automatisch installiert.<br />
Folgen<strong>de</strong> Treiber wer<strong>de</strong>n installiert:<br />
- USB PC-CAMEA-Treiber<br />
- USB-Streaming-Treiber (USB-Vi<strong>de</strong>oübertragung)<br />
•<br />
•<br />
Zur Wie<strong>de</strong>rgabe von Vi<strong>de</strong>oaufnahmen Vi<strong>de</strong>os o<strong>de</strong>r <strong>de</strong>r über<br />
das USB-Kabel vom Memory Camcor<strong>de</strong>r übertragenen Daten<br />
muss DV Media Pro 1.0 auf <strong>de</strong>m PC installiert sein. Nach<strong>de</strong>m<br />
Sie die Software DV Media Pro auf hrem Windows-Computer<br />
installiert und anschließend hren Memory Camcor<strong>de</strong>r mit <strong>de</strong>m<br />
Computer über ein USB-Kabel verbun<strong>de</strong>n haben, stehen hnen<br />
folgen<strong>de</strong> Möglichkeiten zur Verfügung:<br />
- Vi<strong>de</strong>oaufnahmen auf <strong>de</strong>m PC wie<strong>de</strong>rgeben; Software:<br />
DV Driver (DV-Treiber) – DirectX9.0 – Vi<strong>de</strong>o Co<strong>de</strong>c<br />
- PC-Kamera/USB Streaming; Software:<br />
DV Driver (DV-Treiber) – DirectX9.0 – Vi<strong>de</strong>o Co<strong>de</strong>c<br />
2. Klicken Sie auf “Confirm” (OK), um die Installation <strong>de</strong>r Treiber<br />
fertig zu stellen.<br />
3. Falls “DirectX 9.0” nicht installiert ist, wird es nach <strong>de</strong>r<br />
Konfiguration <strong>de</strong>s DV-Treibers automatisch installiert.<br />
Nach <strong>de</strong>r nstallation von DirectX 9.0 muss <strong>de</strong>r Computer neu gestartet wer<strong>de</strong>n.<br />
Falls DirectX 9.0 bereits installiert war, muss <strong>de</strong>r Computer nicht neu gestartet wer<strong>de</strong>n.<br />
Anwendungsinstallation - Vi<strong>de</strong>o-Co<strong>de</strong>c<br />
• Klicken Sie auf <strong>de</strong>m Setup-Bildschirm auf “Vi<strong>de</strong>o Co<strong>de</strong>c”. Vi<strong>de</strong>o Co<strong>de</strong>c wird zur<br />
Wie<strong>de</strong>rgabe <strong>de</strong>r mit <strong>de</strong>m Memory Camcor<strong>de</strong>r aufgenommenen Vi<strong>de</strong>odateien<br />
benötigt.<br />
erman_71


