Bedienungsanleitung / Operation manual 30 MHz Digital ...
Bedienungsanleitung / Operation manual 30 MHz Digital ...
Bedienungsanleitung / Operation manual 30 MHz Digital ...

Erfolgreiche ePaper selbst erstellen
Machen Sie aus Ihren PDF Publikationen ein blätterbares Flipbook mit unserer einzigartigen Google optimierten e-Paper Software.
The description of the cursor measurement menu is shown as the following table:<br />
Function Menu Setting Description<br />
Type<br />
OFF<br />
Voltage<br />
Time<br />
Switch off the cursor measurement.<br />
Display the voltage measurement cursor and menu.<br />
Display the time measurement cursor and menu.<br />
Source<br />
CH1 Display the channel generating the waveform to which the cursor<br />
CH2 measurement will be applied.<br />
When carrying out the cursor measurement, the position of Cursor 1 can be adjusted with the VERTICAL<br />
POSITION knob of Channel 1, and that of Cursor 2 can be adjusted with the VERTICAL POSITION knob of<br />
Channel 2.<br />
Perform the following operation steps for the voltage cursor measurement of the channel CH1:<br />
1. Press Cursor and recall the Cursor Measure menu.<br />
2. Press the H2 button and choose CH1 for Source.<br />
3. Press the H1 button, the Type menu will display at the right of the screen. Then press the F2 button to<br />
choose Voltage for Type, with two purple dotted lines displayed along the horizontal direction of the<br />
screen, which indicating Cursor1 and Cursor2.<br />
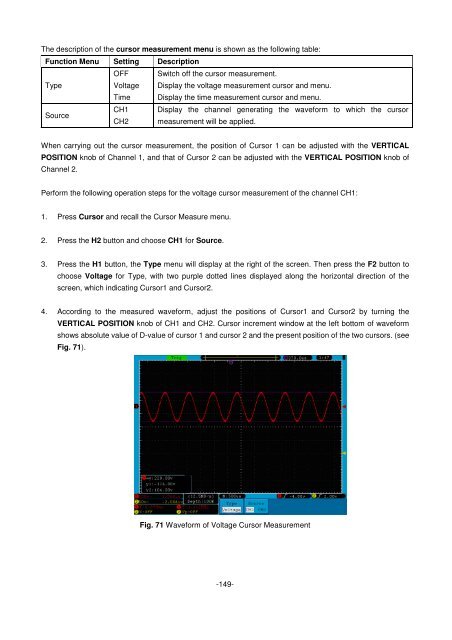
4. According to the measured waveform, adjust the positions of Cursor1 and Cursor2 by turning the<br />
VERTICAL POSITION knob of CH1 and CH2. Cursor increment window at the left bottom of waveform<br />
shows absolute value of D-value of cursor 1 and cursor 2 and the present position of the two cursors. (see<br />
Fig. 71).<br />
Fig. 71 Waveform of Voltage Cursor Measurement<br />
-149-