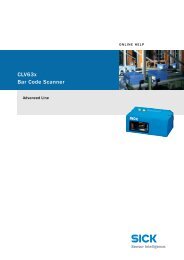
CLV63x Bar Code Scanner CLV63x Bar Code Scanner - Sick
CLV63x Bar Code Scanner CLV63x Bar Code Scanner - Sick
CLV63x Bar Code Scanner CLV63x Bar Code Scanner - Sick

Create successful ePaper yourself
Turn your PDF publications into a flip-book with our unique Google optimized e-Paper software.
Operating Instructions Chapter 5<br />
<strong>CLV63x</strong> <strong>Bar</strong> <strong>Code</strong> <strong>Scanner</strong><br />
5 Installation<br />
Installation<br />
5.1 Overview of installation sequences<br />
This chapter describes the installation sequences for the bar code scanner and its external<br />
components.<br />
The typical installation sequences are displayed below:<br />
• Changing the language of the laser warning sign (if necessary)<br />
• Selecting the installation location for the bar code scanner<br />
• Aligning the bar code scanner to the object carrying the bar code<br />
• Installing the bar code scanner<br />
• Installing connection module CDB620 or CDM420<br />
• Connecting the bar code scanner to connection module CDB620 or CDM420<br />
• Adjusting the bar code scanner<br />
• Installing the reading pulse sensor for reading pulse triggering<br />
Important Do not open the bar code scanner's housing. If the device is opened, the SICK AG warranty<br />
shall not apply.<br />
5.2 Installation preparations<br />
The following general requirements should be observed for installation:<br />
• Typical space requirement: application-specific and type-dependent (reading range)<br />
• Unobstructed view of the objects for the bar code scanner<br />
• Stable installation bracket with sufficient load capacity and measurements suited to<br />
the bar code scanner (see chapter 10.4 <strong>CLV63x</strong> <strong>Bar</strong> <strong>Code</strong> <strong>Scanner</strong> dimensional drawings,<br />
page 90)<br />
• Shock absorbent and vibration free attachment<br />
The following tools and resources are required for installation:<br />
• Two M5 bolts:<br />
To fix bracket no. 2020410, quick release clamp no. 2025526 or fix bracket<br />
no. 2042800 to the base.<br />
The bolt length depends on the wall thickness of the base.<br />
• Laser warning sign set (if necessary)<br />
• Tool<br />
• Tape measure (up to 1 m (3.28ft))<br />
• Goniometer<br />
5.2.1 Components to be installed<br />
The following components have to be placed ready for installation:<br />
• <strong>CLV63x</strong> <strong>Bar</strong> <strong>Code</strong> <strong>Scanner</strong><br />
8011970/S345/2008-04-16 © SICK AG · Division Auto Ident · Germany · All rights reserved 39