

mitac 8599.pdf - tim.id.au
mitac 8599.pdf - tim.id.au
mitac 8599.pdf - tim.id.au

You also want an ePaper? Increase the reach of your titles
YUMPU automatically turns print PDFs into web optimized ePapers that Google loves.
2.2.5 CD/DVD-ROM Drive<br />
Disassembly<br />
Reassembly<br />
8599 N/B Maintenance<br />
1. Carefully put the notebook ups<strong>id</strong>e down. Remove the battery pack. (Refer to section 2.2.1 Disassembly)<br />
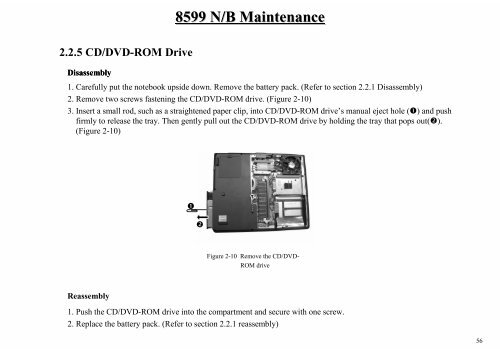
2. Remove two screws fastening the CD/DVD-ROM drive. (Figure 2-10)<br />
3. Insert a small rod, such as a straightened paper clip, into CD/DVD-ROM drive’s manual eject hole () and push<br />
firmly to release the tray. Then gently pull out the CD/DVD-ROM drive by holding the tray that pops out().<br />
(Figure 2-10)<br />
<br />
<br />
Figure 2-10 Remove the CD/DVD-<br />
ROM drive<br />
1. Push the CD/DVD-ROM drive into the compartment and secure with one screw.<br />
2. Replace the battery pack. (Refer to section 2.2.1 reassembly)<br />
56


