

Wooden Boat Restoration Repair - WEST SYSTEM Epoxy
Wooden Boat Restoration Repair - WEST SYSTEM Epoxy
Wooden Boat Restoration Repair - WEST SYSTEM Epoxy

You also want an ePaper? Increase the reach of your titles
YUMPU automatically turns print PDFs into web optimized ePapers that Google loves.
3.2 Drilling and filling<br />
A common, but much less effective, method of dealing with rotted areas is to drill a<br />
pattern of holes in the affected area and inject epoxy into the holes to penetrate and<br />
stabilize the area. This is a last resort method, especially if wood strength is critical. The<br />
biggest problem with this method is that you can never be sure of the extent of epoxy<br />
penetration into the damaged wood. Testing of the physical properties of repaired<br />
samples shows drilling and filling to be inferior to excavating and filling. Also, drilling<br />
and filling is impossible on overhead surfaces and difficult on vertical surfaces.<br />
However, it may be useful in some situations, where maximum strength is not required<br />
or the rotted area is too difficult to reach for excavating and filling. If you choose this<br />
method, we recommend the following procedure:<br />
1. Drill a pattern of 3 16" diameter holes over the rotted area. Space the holes 1" or less from<br />
center to center in all directions. Drill each hole deep enough to pass through the rot,<br />
just into solid wood. On vertical surfaces, drill the holes downward at approximately<br />
45°.<br />
2. Dry the area thoroughly. If necessary, use heat guns or fans to accelerate drying.<br />
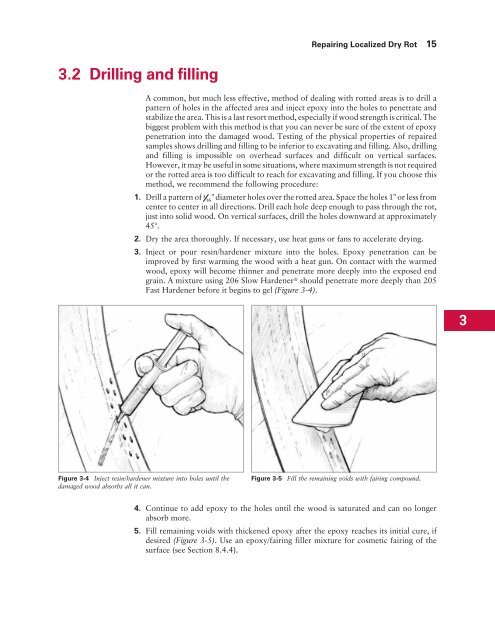
3. Inject or pour resin/hardener mixture into the holes. <strong>Epoxy</strong> penetration can be<br />
improved by first warming the wood with a heat gun. On contact with the warmed<br />
wood, epoxy will become thinner and penetrate more deeply into the exposed end<br />
grain. A mixture using 206 Slow Hardener ® should penetrate more deeply than 205<br />
Fast Hardener before it begins to gel (Figure 3-4).<br />
Figure 3-4 Inject resin/hardener mixture into holes until the<br />
damaged wood absorbs all it can.<br />
<strong>Repair</strong>ing Localized Dry Rot 15<br />
Figure 3-5 Fill the remaining voids with fairing compound.<br />
4. Continue to add epoxy to the holes until the wood is saturated and can no longer<br />
absorb more.<br />
5. Fill remaining voids with thickened epoxy after the epoxy reaches its initial cure, if<br />
desired (Figure 3-5). Use an epoxy/fairing filler mixture for cosmetic fairing of the<br />
surface (see Section 8.4.4).<br />
3


