

Wooden Boat Restoration Repair - WEST SYSTEM Epoxy
Wooden Boat Restoration Repair - WEST SYSTEM Epoxy
Wooden Boat Restoration Repair - WEST SYSTEM Epoxy

Create successful ePaper yourself
Turn your PDF publications into a flip-book with our unique Google optimized e-Paper software.
5 Bond the second layer of veneers after the first layer has reached a partial cure, or a full<br />
cure with sanding (Figure 5-18). Run the veneers diagonally in the opposite direction,<br />
about 35° from vertical. Remove the staples only in the area under the veneer being<br />
bonded. Coat the face of the new veneer and the contact area of the first layer including<br />
both scarfs. Staple through the veneers into the stringers and at the scarfs as necessary<br />
to hold the veneers flat.<br />
6. Continue until all the veneers are in place and you’ve matched the thickness of the<br />
original skin (Figure 5-19). By removing the staples in the previous layer only under<br />
each new veneer, all previous layers of veneer will stay in place even though the epoxy<br />
has not thoroughly cured. This will allow you to bond several layers of veneers in one<br />
continuous operation. Be sure the staples are long enough to provide clamping<br />
pressure by penetrating to the stringers or veneers that have cured fully. Allow the final<br />
layer to cure thoroughly before removing staples, fairing and final finishing.<br />
5.4.2 Laminating a patch away from the damaged area<br />
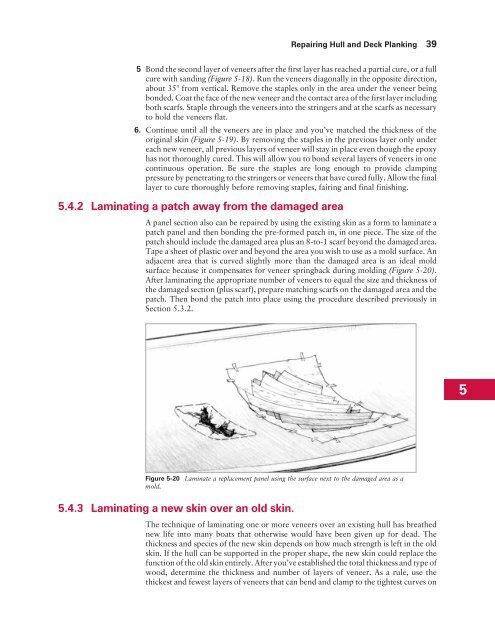
A panel section also can be repaired by using the existing skin as a form to laminate a<br />
patch panel and then bonding the pre-formed patch in, in one piece. The size of the<br />
patch should include the damaged area plus an 8-to-1 scarf beyond the damaged area.<br />
Tape a sheet of plastic over and beyond the area you wish to use as a mold surface. An<br />
adjacent area that is curved slightly more than the damaged area is an ideal mold<br />
surface because it compensates for veneer springback during molding (Figure 5-20).<br />
After laminating the appropriate number of veneers to equal the size and thickness of<br />
the damaged section (plus scarf), prepare matching scarfs on the damaged area and the<br />
patch. Then bond the patch into place using the procedure described previously in<br />
Section 5.3.2.<br />
5.4.3 Laminating a new skin over an old skin.<br />
<strong>Repair</strong>ing Hull and Deck Planking 39<br />
Figure 5-20 Laminate a replacement panel using the surface next to the damaged area as a<br />
mold.<br />
The technique of laminating one or more veneers over an existing hull has breathed<br />
new life into many boats that otherwise would have been given up for dead. The<br />
thickness and species of the new skin depends on how much strength is left in the old<br />
skin. If the hull can be supported in the proper shape, the new skin could replace the<br />
function of the old skin entirely. After you’ve established the total thickness and type of<br />
wood, determine the thickness and number of layers of veneer. As a rule, use the<br />
thickest and fewest layers of veneers that can bend and clamp to the tightest curves on<br />
5


