

Wooden Boat Restoration Repair - WEST SYSTEM Epoxy
Wooden Boat Restoration Repair - WEST SYSTEM Epoxy
Wooden Boat Restoration Repair - WEST SYSTEM Epoxy

Create successful ePaper yourself
Turn your PDF publications into a flip-book with our unique Google optimized e-Paper software.
plywood are to be used, cut one layer to the dimension of each step. Dry fit the new<br />
panel to fit slightly below the existing surface.<br />
4. Wet out the bonding area of the panels with resin/hardener mixture. Recoat the end<br />
grain as necessary. (Plywood end grain will absorb a lot of epoxy.)<br />
5. Apply thickened epoxy/403 or 406 (mayonnaise consistency) to the new panel’s<br />
bonding area. Apply enough thickened epoxy so that a small amount will squeeze out<br />
when you push the new panel into its dry-fit position.<br />
6. Clamp the new panel in position with temporary staples or screws. Permanent<br />
fasteners should be non-corroding and pilot holes should be wet out with epoxy. Clean<br />
up excess epoxy before it cures. Allow the epoxy to cure thoroughly before removing<br />
clamps. Bond multiple thinner layers in place, one at a time, following the same<br />
procedure. Use a thinner epoxy mixture on the flat bonding areas between the layers.<br />
7. Sand the surface and fill low areas with epoxy/407 or 410 low-density filler (peanut<br />
butter consistency). Use a spreader to apply the thickened epoxy, slightly overfilling<br />
low areas on the surface. Allow the mixture to cure thoroughly before fairing.<br />
5.3.3 Replacing/installing plywood<br />
<strong>Repair</strong>ing Hull and Deck Planking 36<br />
You may install new plywood over exposed frames or over existing hull or deck<br />
surfaces. Plywood used as the primary skin (bonded directly to the frames) may be laid<br />
out with scarfed joints falling directly over the frames or with butt joints over backing<br />
plates between the frames. Scarfed joints offer a cleaner appearance from the interior.<br />
The frame spacing and size of the boat determine the thickness of the plywood. The<br />
amount of compounding determines whether the total thickness can be applied in one<br />
layer or in multiple layers. Apply thinner plywood in multiple layers if one layer is too<br />
thick to bend over a curved surface. Apply a primary plywood skin as follows:<br />
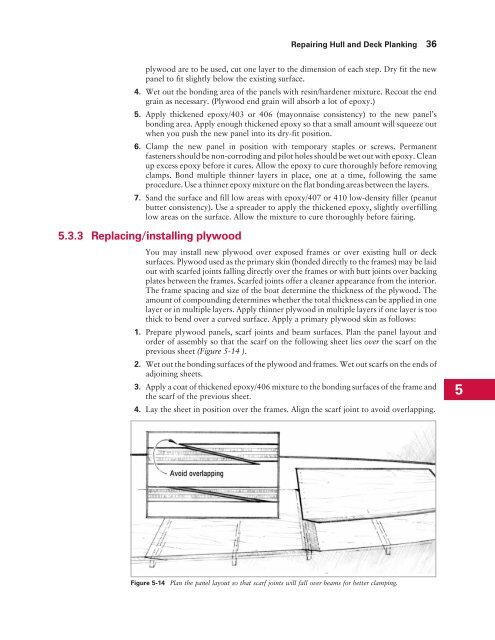
1. Prepare plywood panels, scarf joints and beam surfaces. Plan the panel layout and<br />
order of assembly so that the scarf on the following sheet lies over the scarf on the<br />
previous sheet (Figure 5-14 ).<br />
2. Wet out the bonding surfaces of the plywood and frames. Wet out scarfs on the ends of<br />
adjoining sheets.<br />
3. Apply a coat of thickened epoxy/406 mixture to the bonding surfaces of the frame and<br />
the scarf of the previous sheet.<br />
4. Lay the sheet in position over the frames. Align the scarf joint to avoid overlapping.<br />
Figure 5-14 Plan the panel layout so that scarf joints will fall over beams for better clamping.<br />
5


