

Wooden Boat Restoration Repair - WEST SYSTEM Epoxy
Wooden Boat Restoration Repair - WEST SYSTEM Epoxy
Wooden Boat Restoration Repair - WEST SYSTEM Epoxy

Create successful ePaper yourself
Turn your PDF publications into a flip-book with our unique Google optimized e-Paper software.
8.4.4 Fairing<br />
Fairing refers to the filling and shaping of low areas so they blend with the surrounding<br />
surfaces and appear “fair” to the eye and touch. After major structural assembly has<br />
been completed, final fairing can be easily accomplished with <strong>WEST</strong> <strong>SYSTEM</strong> epoxy and<br />
407 or 410 low-density fillers.<br />
1. Prepare the surface as you would for bonding (Section 8.4.1). Sand smooth any bumps<br />
or ridges on the surface and remove all dust from the area to be faired.<br />
2. Wet out porous surfaces with unthickened epoxy (Figure 8-14).<br />
3. Mix resin/hardener and 407 Low-Density or 410 Microlight ® filler to a peanut butter<br />
consistency.<br />
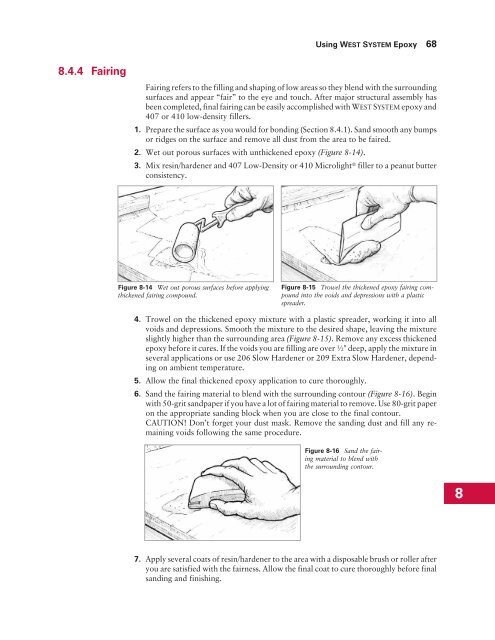
Figure 8-14 Wet out porous surfaces before applying<br />
thickened fairing compound.<br />
Using <strong>WEST</strong> <strong>SYSTEM</strong> <strong>Epoxy</strong> 68<br />
Figure 8-15 Trowel the thickened epoxy fairing compound<br />
into the voids and depressions with a plastic<br />
spreader.<br />
4. Trowel on the thickened epoxy mixture with a plastic spreader, working it into all<br />
voids and depressions. Smooth the mixture to the desired shape, leaving the mixture<br />
slightly higher than the surrounding area (Figure 8-15). Remove any excess thickened<br />
epoxy before it cures. If the voids you are filling are over ½" deep, apply the mixture in<br />
several applications or use 206 Slow Hardener or 209 Extra Slow Hardener, depending<br />
on ambient temperature.<br />
5. Allow the final thickened epoxy application to cure thoroughly.<br />
6. Sand the fairing material to blend with the surrounding contour (Figure 8-16). Begin<br />
with 50-grit sandpaper if you have a lot of fairing material to remove. Use 80-grit paper<br />
on the appropriate sanding block when you are close to the final contour.<br />
CAUTION! Don’t forget your dust mask. Remove the sanding dust and fill any remaining<br />
voids following the same procedure.<br />
Figure 8-16 Sand the fairing<br />
material to blend with<br />
the surrounding contour.<br />
7. Apply several coats of resin/hardener to the area with a disposable brush or roller after<br />
you are satisfied with the fairness. Allow the final coat to cure thoroughly before final<br />
sanding and finishing.<br />
8


