

Wooden Boat Restoration Repair - WEST SYSTEM Epoxy
Wooden Boat Restoration Repair - WEST SYSTEM Epoxy
Wooden Boat Restoration Repair - WEST SYSTEM Epoxy

You also want an ePaper? Increase the reach of your titles
YUMPU automatically turns print PDFs into web optimized ePapers that Google loves.
4.5 Joint repairs<br />
If the framing is not damaged from rot or impact, you may still want to bond the<br />
framing together to stiffen the structure and seal the joints against moisture. Remove as<br />
many frames as you can and bond them in place using the standard bonding techniques<br />
in Section 8.4.2. Many of the frames that can’t be removed can still be bonded into<br />
place as follows:<br />
1. Support the boat in its proper shape before bonding any joints.<br />
2. Open as many of the joints as you can reach, between frames and between frames and<br />
the outer skin. Loosen fasteners wherever possible. A small pry bar or wedge may be<br />
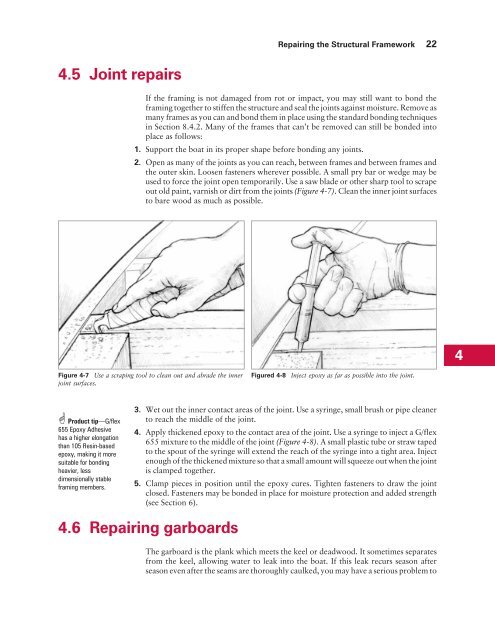
used to force the joint open temporarily. Use a saw blade or other sharp tool to scrape<br />
out old paint, varnish or dirt from the joints (Figure 4-7). Clean the inner joint surfaces<br />
to bare wood as much as possible.<br />
Figure 4-7 Use a scraping tool to clean out and abrade the inner<br />
joint surfaces.<br />
Product tip—G/flex<br />
655 <strong>Epoxy</strong> Adhesive<br />
has a higher elongation<br />
than 105 Resin-based<br />
epoxy, making it more<br />
suitable for bonding<br />
heavier, less<br />
dimensionally stable<br />
framing members.<br />
3. Wet out the inner contact areas of the joint. Use a syringe, small brush or pipe cleaner<br />
to reach the middle of the joint.<br />
4. Apply thickened epoxy to the contact area of the joint. Use a syringe to inject a G/flex<br />
655 mixture to the middle of the joint (Figure 4-8). A small plastic tube or straw taped<br />
to the spout of the syringe will extend the reach of the syringe into a tight area. Inject<br />
enough of the thickened mixture so that a small amount will squeeze out when the joint<br />
is clamped together.<br />
5. Clamp pieces in position until the epoxy cures. Tighten fasteners to draw the joint<br />
closed. Fasteners may be bonded in place for moisture protection and added strength<br />
(see Section 6).<br />
4.6 <strong>Repair</strong>ing garboards<br />
<strong>Repair</strong>ing the Structural Framework 22<br />
Figured 4-8 Inject epoxy as far as possible into the joint.<br />
The garboard is the plank which meets the keel or deadwood. It sometimes separates<br />
from the keel, allowing water to leak into the boat. If this leak recurs season after<br />
season even after the seams are thoroughly caulked, you may have a serious problem to<br />
4


