

Wooden Boat Restoration Repair - WEST SYSTEM Epoxy
Wooden Boat Restoration Repair - WEST SYSTEM Epoxy
Wooden Boat Restoration Repair - WEST SYSTEM Epoxy

Create successful ePaper yourself
Turn your PDF publications into a flip-book with our unique Google optimized e-Paper software.
2. Apply thickened epoxy to one bonding surface. Modify the resin/hardener mixture by<br />
stirring in the appropriate filler until it becomes thick enough to bridge any gaps<br />
between the mating surfaces and to prevent “resin-starved” joints. Apply enough of the<br />
mixture to one of the surfaces, so that a small amount will squeeze out when the<br />
surfaces are joined together with a force equivalent to a firm hand grip (Figure 8-9).<br />
Thickened epoxy can be applied immediately over the wet-out surface or any time<br />
before the wet-out is no longer tacky. For most small bonding operations, add the filler<br />
to the resin/hardener mixture remaining in the batch that was used for the wet-out.<br />
Mix enough resin/hardener for both steps. Add the filler quickly after the surface is wet<br />
out and allow for a shorter working life of the mixture.<br />
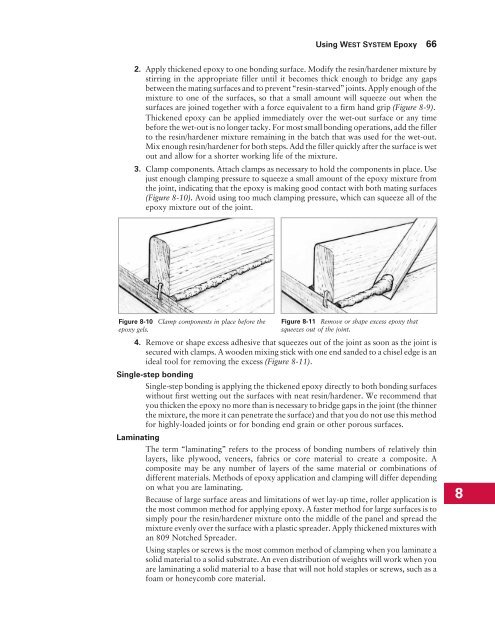
3. Clamp components. Attach clamps as necessary to hold the components in place. Use<br />
just enough clamping pressure to squeeze a small amount of the epoxy mixture from<br />
the joint, indicating that the epoxy is making good contact with both mating surfaces<br />
(Figure 8-10). Avoid using too much clamping pressure, which can squeeze all of the<br />
epoxy mixture out of the joint.<br />
Figure 8-10 Clamp components in place before the<br />
epoxy gels.<br />
Using <strong>WEST</strong> <strong>SYSTEM</strong> <strong>Epoxy</strong> 66<br />
Figure 8-11 Remove or shape excess epoxy that<br />
squeezes out of the joint.<br />
4. Remove or shape excess adhesive that squeezes out of the joint as soon as the joint is<br />
secured with clamps. A wooden mixing stick with one end sanded to a chisel edge is an<br />
ideal tool for removing the excess (Figure 8-11).<br />
Single-step bonding<br />
Single-step bonding is applying the thickened epoxy directly to both bonding surfaces<br />
without first wetting out the surfaces with neat resin/hardener. We recommend that<br />
you thicken the epoxy no more than is necessary to bridge gaps in the joint (the thinner<br />
the mixture, the more it can penetrate the surface) and that you do not use this method<br />
for highly-loaded joints or for bonding end grain or other porous surfaces.<br />
Laminating<br />
The term “laminating” refers to the process of bonding numbers of relatively thin<br />
layers, like plywood, veneers, fabrics or core material to create a composite. A<br />
composite may be any number of layers of the same material or combinations of<br />
different materials. Methods of epoxy application and clamping will differ depending<br />
on what you are laminating.<br />
Because of large surface areas and limitations of wet lay-up time, roller application is<br />
the most common method for applying epoxy. A faster method for large surfaces is to<br />
simply pour the resin/hardener mixture onto the middle of the panel and spread the<br />
mixture evenly over the surface with a plastic spreader. Apply thickened mixtures with<br />
an 809 Notched Spreader.<br />
Using staples or screws is the most common method of clamping when you laminate a<br />
solid material to a solid substrate. An even distribution of weights will work when you<br />
are laminating a solid material to a base that will not hold staples or screws, such as a<br />
foam or honeycomb core material.<br />
8


