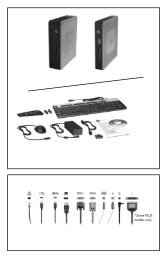
HP LaserJet 5200 user guide - ENWW
HP LaserJet 5200 user guide - ENWW
HP LaserJet 5200 user guide - ENWW

You also want an ePaper? Increase the reach of your titles
YUMPU automatically turns print PDFs into web optimized ePapers that Google loves.
<strong>HP</strong> maintenance agreements<br />
<strong>HP</strong> has several types of maintenance agreements that meet a wide range of support needs.<br />
Maintenance agreements are not part of the standard warranty. Support services may vary by area.<br />
Check with your local <strong>HP</strong> dealer to determine the services available to you.<br />
On-site service agreements<br />
To provide you with the level of support best suited to your needs, <strong>HP</strong> has on-site service<br />
agreements with a selection of response times.<br />
Next-day on-site service<br />
This agreement provides support by the next working day following a service request. Extended<br />
coverage hours and extended travel beyond <strong>HP</strong>’s designated service zones are available on most onsite<br />
agreements (for additional charges).<br />
Weekly (volume) on-site service<br />
This agreement provides scheduled weekly on-site visits for organizations with many <strong>HP</strong> products.<br />
This agreement is designated for sites using 25 or more workstation products, including printers,<br />
plotters, computers, and disk drives.<br />
Repacking the printer<br />
If <strong>HP</strong> Customer Care determines that your printer needs to be returned to <strong>HP</strong> for repair, follow the<br />
steps below to repack the printer before shipping it.<br />
CAUTION Shipping damage as a result of inadequate packing is the customer’s<br />
responsibility.<br />
To repack the printer<br />
1. Remove and retain any DIMMs or CompactFlash cards that you have purchased and installed<br />
in the printer. Do not remove the DIMM that came with the printer.<br />
CAUTION Static electricity can damage DIMMs. When handling DIMMs, either wear an<br />
antistatic wrist strap, or frequently touch the surface of the DIMM antistatic package and<br />
then touch bare metal on the printer. To remove the DIMMs, see Installing printer memory.<br />
2. Remove and retain the print cartridge.<br />
CAUTION It is extremely important to remove the print cartridge before shipping the<br />
printer. A print cartridge that remains in the printer during shipping will leak and entirely<br />
cover the printer engine and other parts with toner.<br />
To prevent damage to the print cartridge, avoid touching the roller on it, and store the<br />
print cartridge in its original packing material or so that it is not exposed to light.<br />
3. Remove and retain the power cable, interface cable, and optional accessories.<br />
<strong>ENWW</strong> <strong>HP</strong> maintenance agreements 179