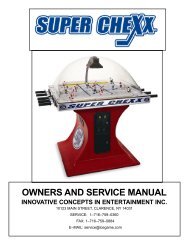
- Page 1 and 2: www.seuservice.com 2ND PRINTING OCT
- Page 3 and 4: BEFORE USING THE PRODUCT, BE SURE T
- Page 5 and 6: TABLE OF CONTENTS BEFORE USING THE
- Page 7 and 8: DEFINITION OF LOCATION MAINTENANCE
- Page 9 and 10: 1. HANDLING PRECAUTIONS When instal
- Page 11 and 12: 2. PRECAUTIONS CONCERNING INSTALLAT
- Page 13 and 14: 3. OPERATION PRECAUTIONS TO BE HEED
- Page 15: WARNING! To avoid electric shock a
- Page 19 and 20: The following Table 5b lists the pa
- Page 21 and 22: 6. ASSEMBLING AND INSTALLATION WARN
- Page 23 and 24: Attach the POP to the POP Holder. S
- Page 25 and 26: FIG. 6. 2 e Provide ventilation spa
- Page 27 and 28: Remove the 1 truss head screw that
- Page 29 and 30: Connect the GD cable connector (for
- Page 31 and 32: 4 POWER SUPPLY, AND EARTH CONNECTIO
- Page 33 and 34: Network Check Screen Each Check Scr
- Page 35 and 36: (2)SOUND TEST SOUND TEST RIGHT SPEA
- Page 37 and 38: 7. CARD READER/WRITER 7-1 SETTING D
- Page 39 and 40: 7-2 HEAD CLEANING STOP IMPORTANT!
- Page 41 and 42: 8. PRECAUTIONS WHEN MOVING THE MACH
- Page 43 and 44: 9. GAME DESCRIPTION The following e
- Page 45 and 46: Game Flow Insert Card Screen: Inse
- Page 47 and 48: Course and rival character selectio
- Page 49 and 50: Time Attack Game Content & Rules T
- Page 51 and 52: 10. EXPLANATION OF TEST AND DATA DI
- Page 53 and 54: 10-2 SYSTEM TEST MODE STOP IMPORTAN
- Page 55 and 56: B. INPUT TEST Select INPUT TEST to
- Page 57 and 58: D. FORCE FEEDBACK CAUTION! If you s
- Page 59 and 60: ACCEL: Make adjustments to ACCEL Pr
- Page 61 and 62: G. CARD R/W TEST STOP IMPORTANT! Cl
- Page 63 and 64: CLEANING PROCESS Cleaning refers to
- Page 65 and 66: WEEK: Set a different store close t
- Page 67 and 68:
Press the TEST Button to move to sc
- Page 69 and 70:
J. BACKUP DATA CLEAR Delete all BOO
- Page 71 and 72:
11-1 REMOVING THE CONTROL PANEL Poo
- Page 73 and 74:
REPLACEMENT PROCEDURE This procedur
- Page 75 and 76:
12. SHIFT LEVER In the Test Mode, i
- Page 77 and 78:
Loosen the screw which secure the P
- Page 79 and 80:
COIN DOOR 71 www.seuservice.com
- Page 81 and 82:
For the purpose of static preventio
- Page 83 and 84:
16. REPLACING THE FLUORESCENT LAMP/
- Page 85 and 86:
Remove the Button Plate. The Button
- Page 87 and 88:
CLEANING THE CABINET SURFACES When
- Page 89 and 90:
TABLE 18. 1 a ERROR DISPLAY CAUSE C
- Page 91 and 92:
18-2 TROUBLESHOOTING (WHEN NO ERROR
- Page 93 and 94:
TABLE 18. 2 PROBLEM CAUSE COUNTERME
- Page 95 and 96:
19. GAME BOARD WARNING! In order t
- Page 97 and 98:
19-2 REMOVING THE GAME BOARD Follo
- Page 99 and 100:
20. COMMUNICATION PLAY 20-1 SETTING
- Page 101 and 102:
22. PARTS LIST 1 2 12 3 5 4 8 6 11
- Page 103 and 104:
Assy Pop ITEM NO. PART NO. DESCRIPT
- Page 105 and 106:
ASSY SPEAKER R (APC-1565) ITEM NO.
- Page 107 and 108:
ASSY CONTROL PANEL (TOF-2000) Attac
- Page 109 and 110:
ASSY HANDLE MECHA (TOF-2500) Plated
- Page 111 and 112:
ASSY ACCEL&BRAKE (SPG-2200) 103 www
- Page 113 and 114:
ASSY BASE BOX (TOF-1520) 9 10 * Not
- Page 115 and 116:
ASSY SEAT 6 107 www.seuservice.com
- Page 117 and 118:
ASSY MAIN BD (TOF-4500) 101 3 ITEM
- Page 119 and 120:
ASSY ELEC BD ITEM NO. PART NO. DESC
- Page 121 and 122:
23. WIRE COLOR CODE TABLE THE WIRE
- Page 123:
Warranty Your new Sega Product is c