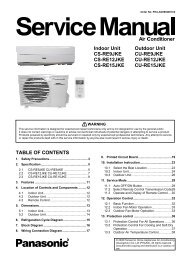
Panasonic Air Conditioner
Panasonic Air Conditioner
Panasonic Air Conditioner

Create successful ePaper yourself
Turn your PDF publications into a flip-book with our unique Google optimized e-Paper software.
10.5.5. Transporting and installing the outdoor unit<br />
• Transporting<br />
1. The outdoor unit should be transported in its original packaging as close to the installation location as possible.<br />
2. If suspending the outdoor unit, use a rope or belt, and use cloth or wood as padding in order to avoid damaging the unit.<br />
• Installation<br />
1. Read the “Selecting the outdoor unit installation location” section thoroughly before installing the outdoor unit.<br />
2. If installing the unit to a concrete base or other solid base, use M10 or W3/8 bolts and nuts to secure the unit, and ensure<br />
that the unit is fully upright and level.<br />
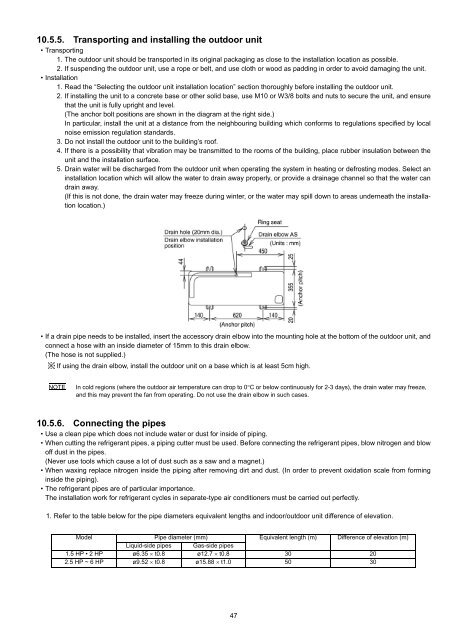
(The anchor bolt positions are shown in the diagram at the right side.)<br />
In particular, install the unit at a distance from the neighbouring building which conforms to regulations specified by local<br />
noise emission regulation standards.<br />
3. Do not install the outdoor unit to the building’s roof.<br />
4. If there is a possibility that vibration may be transmitted to the rooms of the building, place rubber insulation between the<br />
unit and the installation surface.<br />
5. Drain water will be discharged from the outdoor unit when operating the system in heating or defrosting modes. Select an<br />
installation location which will allow the water to drain away properly, or provide a drainage channel so that the water can<br />
drain away.<br />
(If this is not done, the drain water may freeze during winter, or the water may spill down to areas underneath the installation<br />
location.)<br />
• If a drain pipe needs to be installed, insert the accessory drain elbow into the mounting hole at the bottom of the outdoor unit, and<br />
connect a hose with an inside diameter of 15mm to this drain elbow.<br />
(The hose is not supplied.)<br />
If using the drain elbow, install the outdoor unit on a base which is at least 5cm high.<br />
NOTE In cold regions (where the outdoor air temperature can drop to 0°C or below continuously for 2-3 days), the drain water may freeze,<br />
and this may prevent the fan from operating. Do not use the drain elbow in such cases.<br />
10.5.6. Connecting the pipes<br />
• Use a clean pipe which does not include water or dust for inside of piping.<br />
• When cutting the refrigerant pipes, a piping cutter must be used. Before connecting the refrigerant pipes, blow nitrogen and blow<br />
off dust in the pipes.<br />
(Never use tools which cause a lot of dust such as a saw and a magnet.)<br />
• When waxing replace nitrogen inside the piping after removing dirt and dust. (In order to prevent oxidation scale from forming<br />
inside the piping).<br />
• The refrigerant pipes are of particular importance.<br />
The installation work for refrigerant cycles in separate-type air conditioners must be carried out perfectly.<br />
1. Refer to the table below for the pipe diameters equivalent lengths and indoor/outdoor unit difference of elevation.<br />
Model Pipe diameter (mm) Equivalent length (m) Difference of elevation (m)<br />
Liquid-side pipes Gas-side pipes<br />
1.5 HP • 2 HP ø6.35 × t0.8 ø12.7 × t0.8 30 20<br />
2.5 HP ~ 6 HP ø9.52 × t0.8 ø15.88 × t1.0 50 30<br />
47