
You also want an ePaper? Increase the reach of your titles
YUMPU automatically turns print PDFs into web optimized ePapers that Google loves.
BEFORE<br />
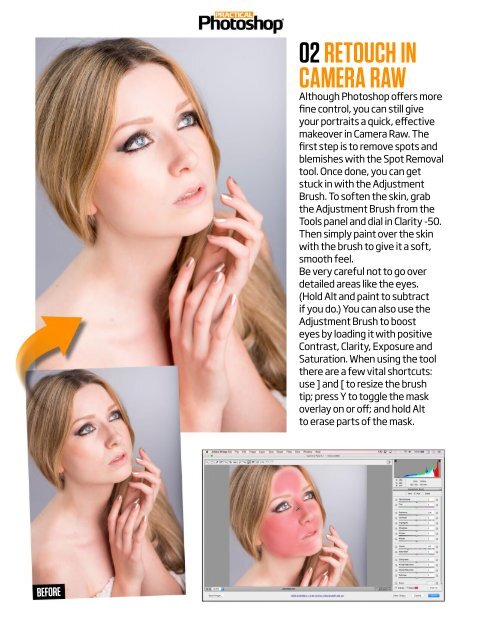
02 RETOUCH IN<br />
CAMERA RAW<br />
Although <strong>Photoshop</strong> offers more<br />
fine control, you can still give<br />
your portraits a quick, effective<br />
makeover in Camera Raw. The<br />
first step is to remove spots and<br />
blemishes with the Spot Removal<br />
tool. Once done, you can get<br />
stuck in with the Adjustment<br />
Brush. To soften the skin, grab<br />
the Adjustment Brush from the<br />
Tools panel and dial in Clarity -50.<br />
Then simply paint over the skin<br />
with the brush to give it a soft,<br />
smooth feel.<br />
Be very careful not to go over<br />
detailed areas like the eyes.<br />
(Hold Alt and paint to subtract<br />
if you do.) You can also use the<br />
Adjustment Brush to boost<br />
eyes by loading it with positive<br />
Contrast, Clarity, Exposure and<br />
Saturation. When using the tool<br />
there are a few vital shortcuts:<br />
use ] and [ to resize the brush<br />
tip; press Y to toggle the mask<br />
overlay on or off; and hold Alt<br />
to erase parts of the mask.